
Image gallery
The Image gallery is a centralized repository for managing images in TBMQ, found on the Image gallery tab of the White labeling page. It provides the source for the logo and website icon used by white labeling on the application and login pages. Any image format is accepted, up to 10 MB per file.
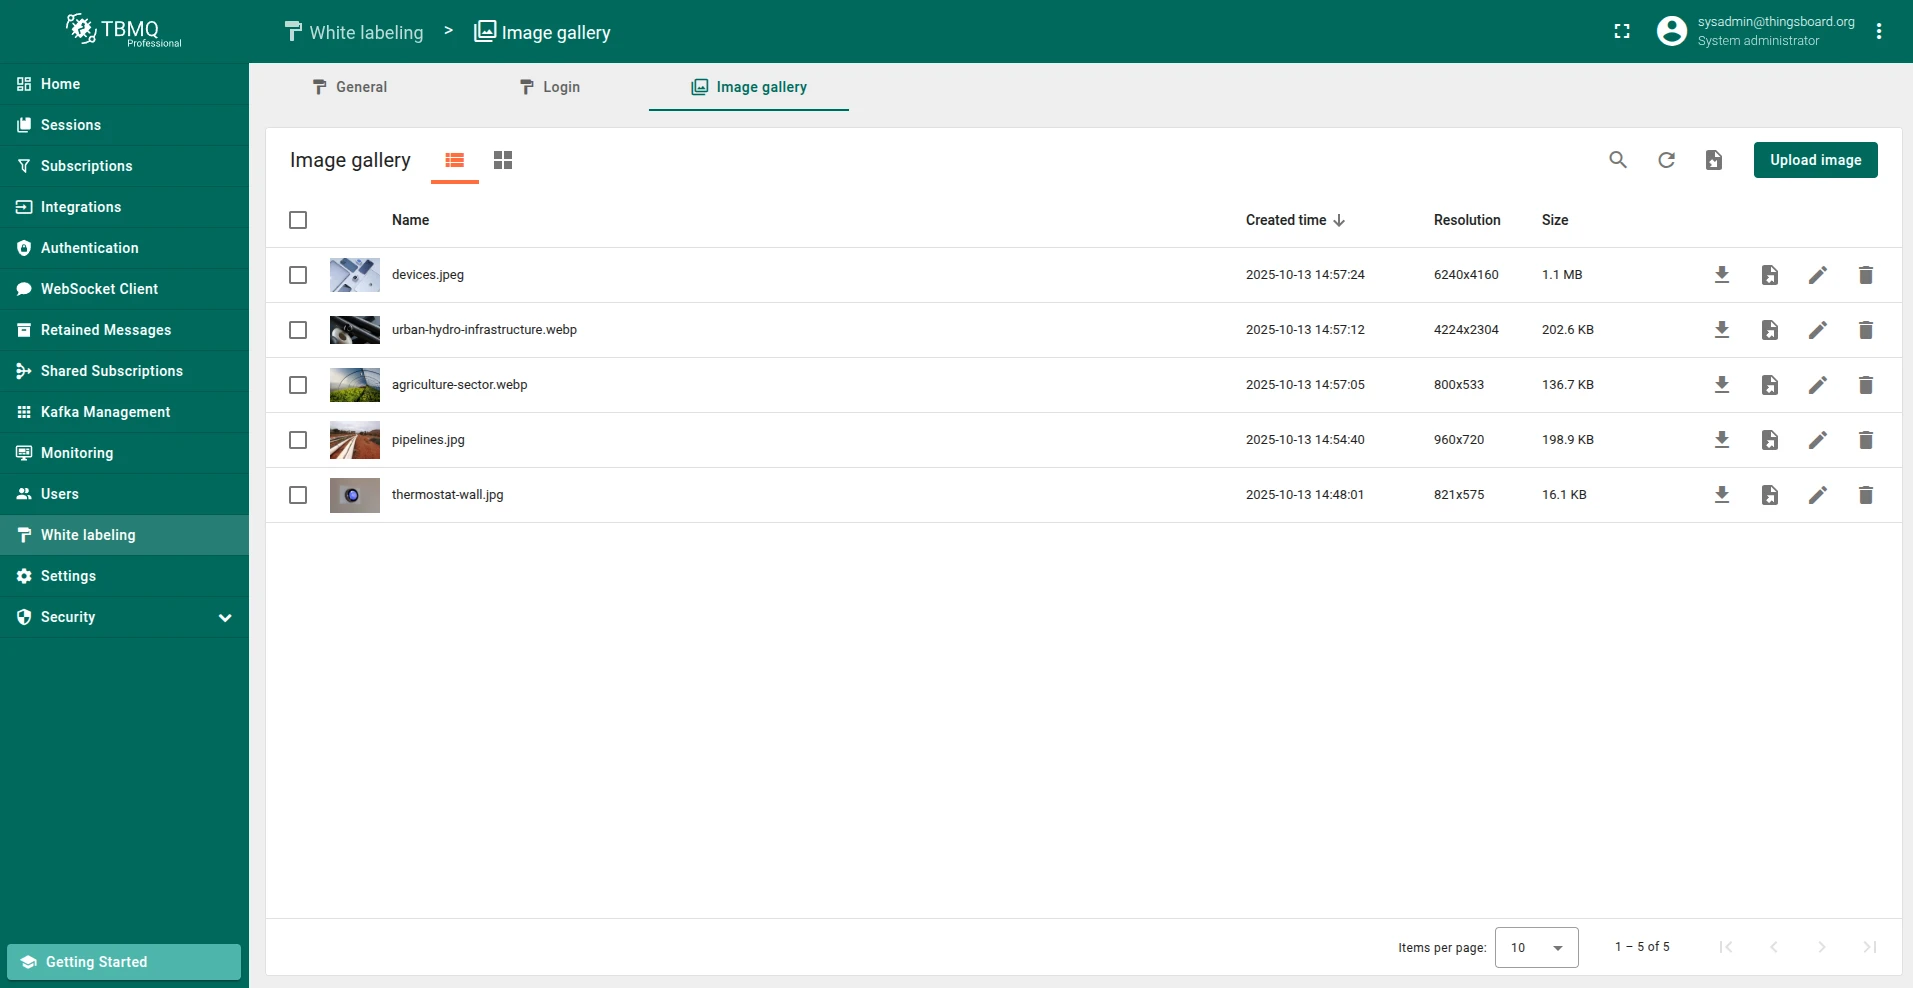
Use Search image to filter the gallery by name, and Include system images to also list the images shipped with TBMQ. System images are read-only: their edit action opens Image details instead of Edit image.
Add image
Section titled “Add image”Images can be added in image file format (PNG, JPEG, GIF, etc.) or JSON file format.
Upload image
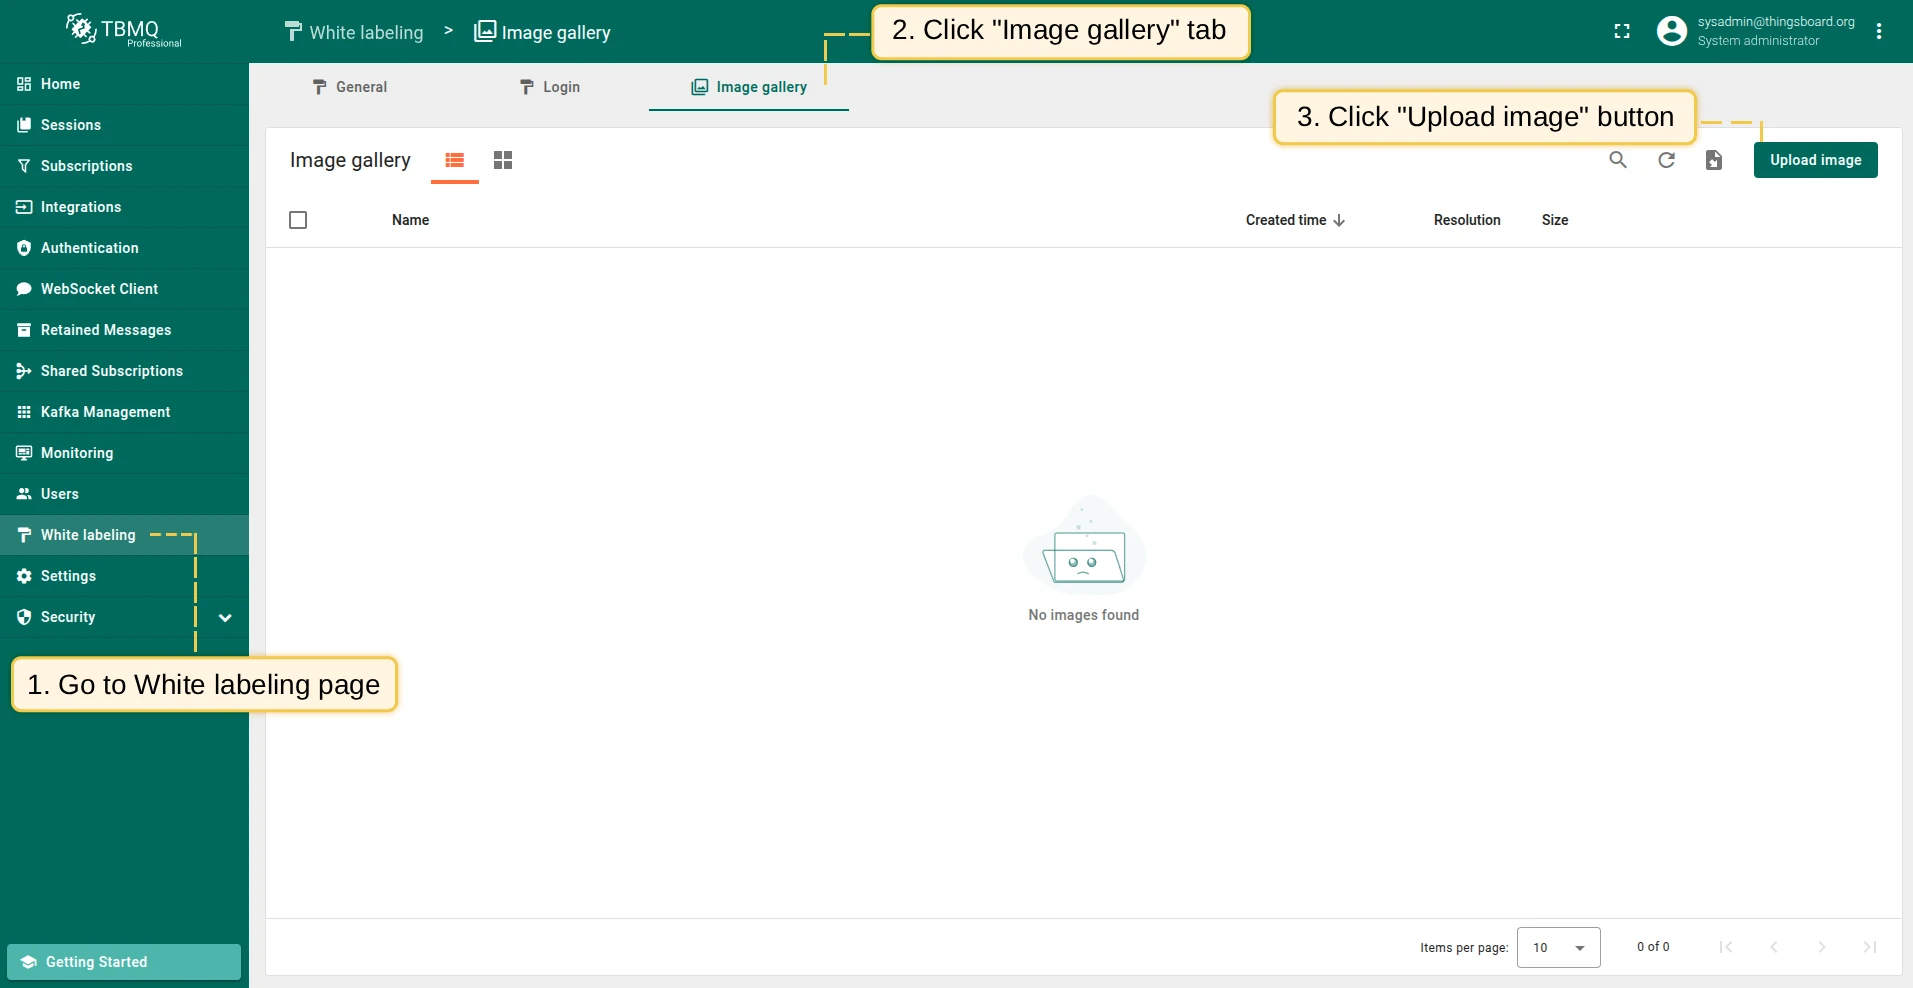
Section titled “Upload image”To upload an image in image file format:
-
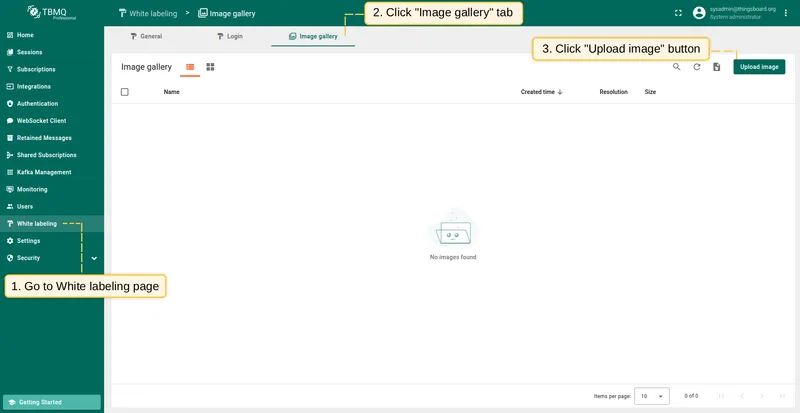
Go to the White labeling page and click the Image gallery tab. Then click Upload image in the top right corner.
-
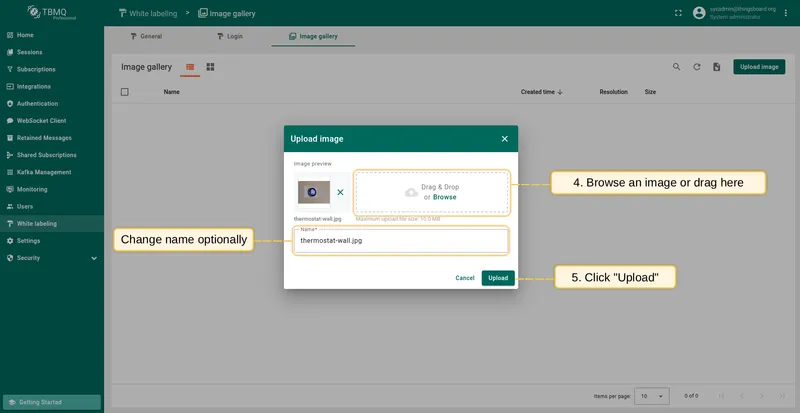
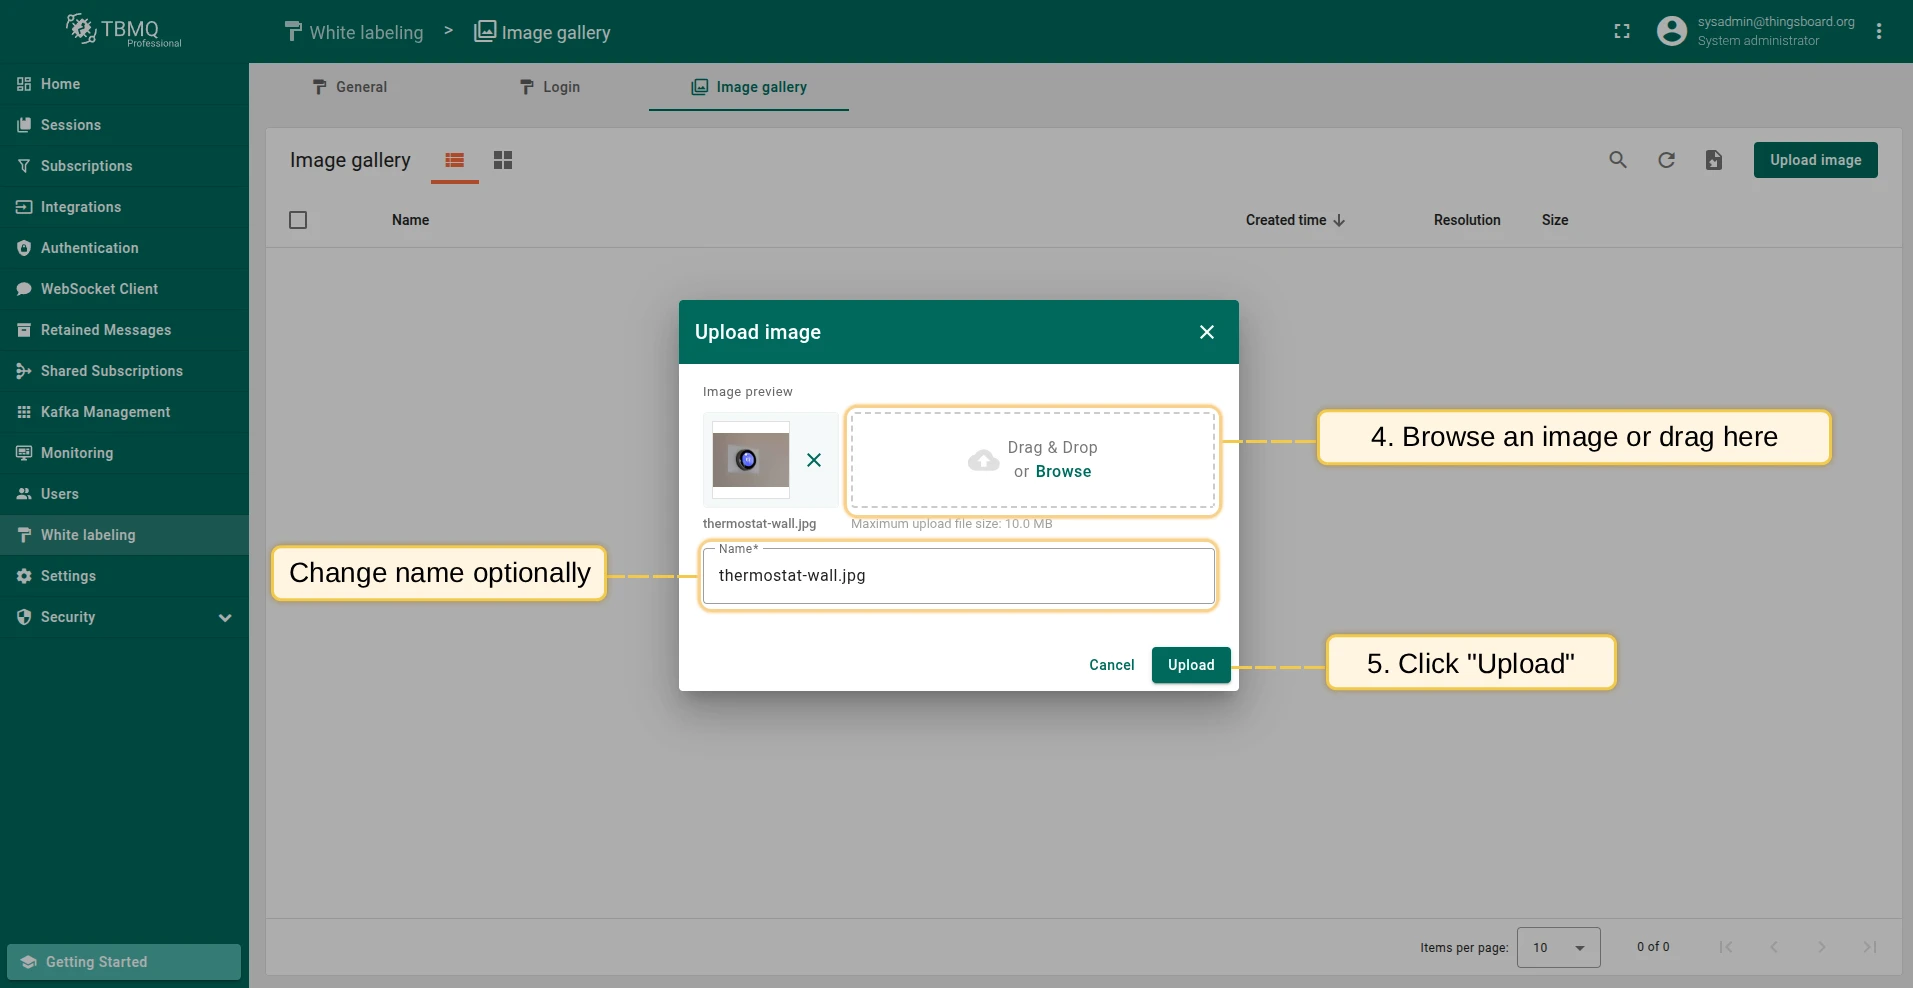
Select an image or drag it into the Upload image window. The Name field is prefilled from the file name — adjust it if needed, then click Upload.
-
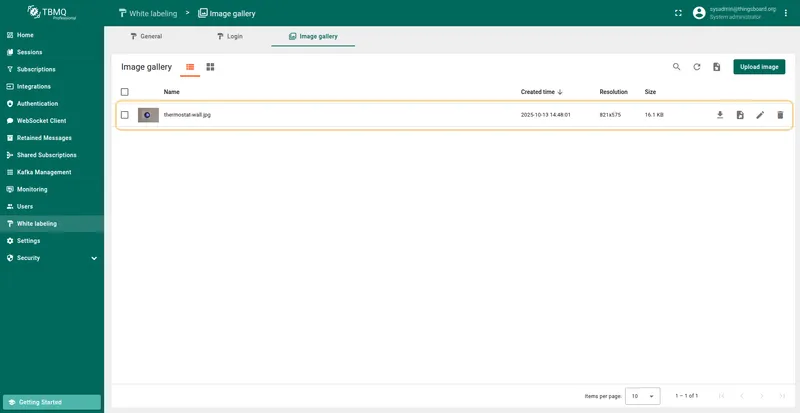
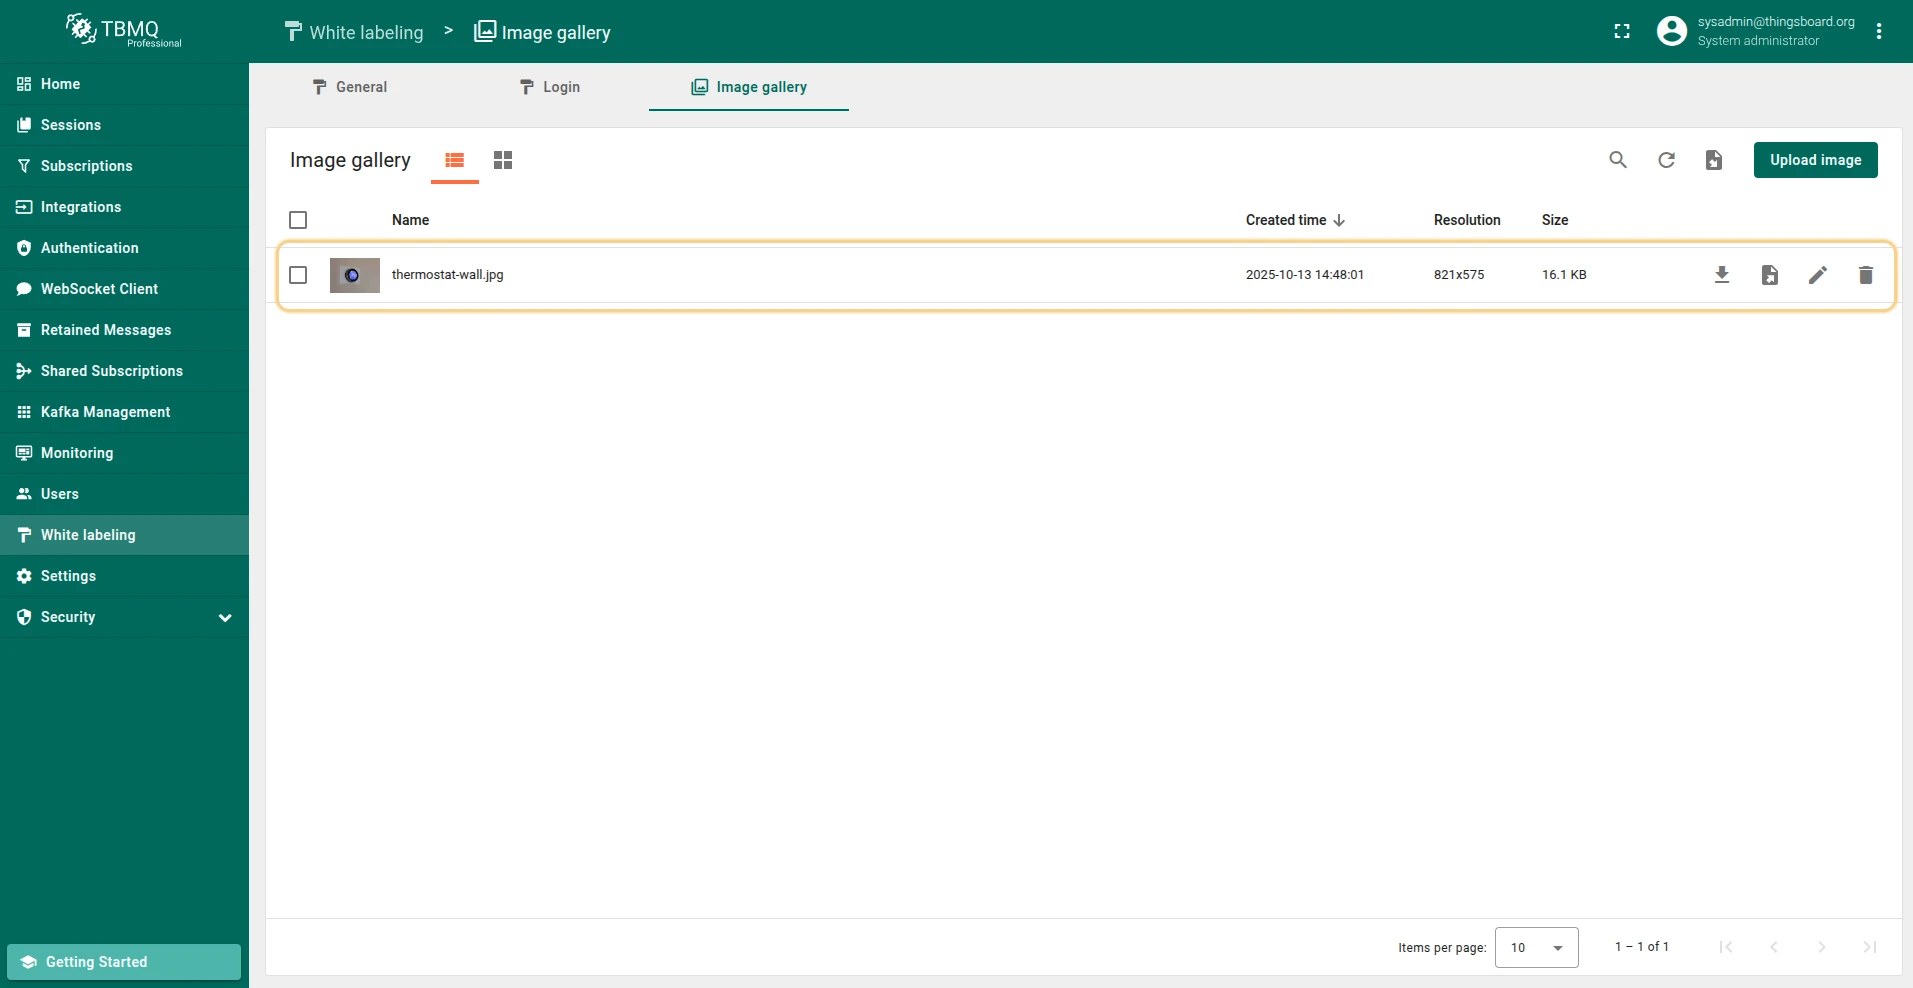
The image has been uploaded.
Import image from JSON
Section titled “Import image from JSON”To import an image in JSON file format:
-
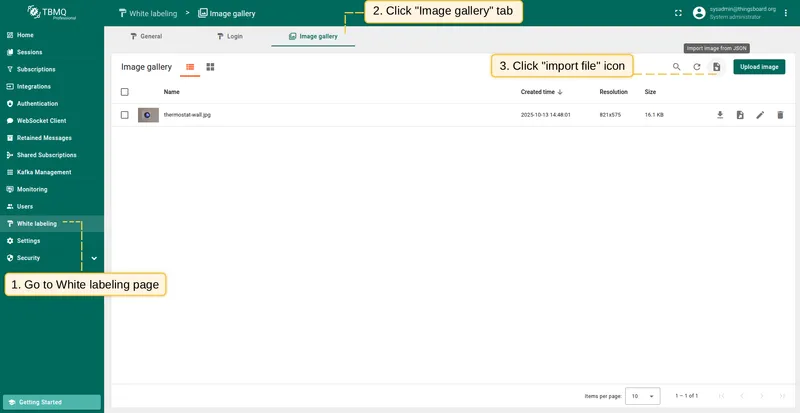
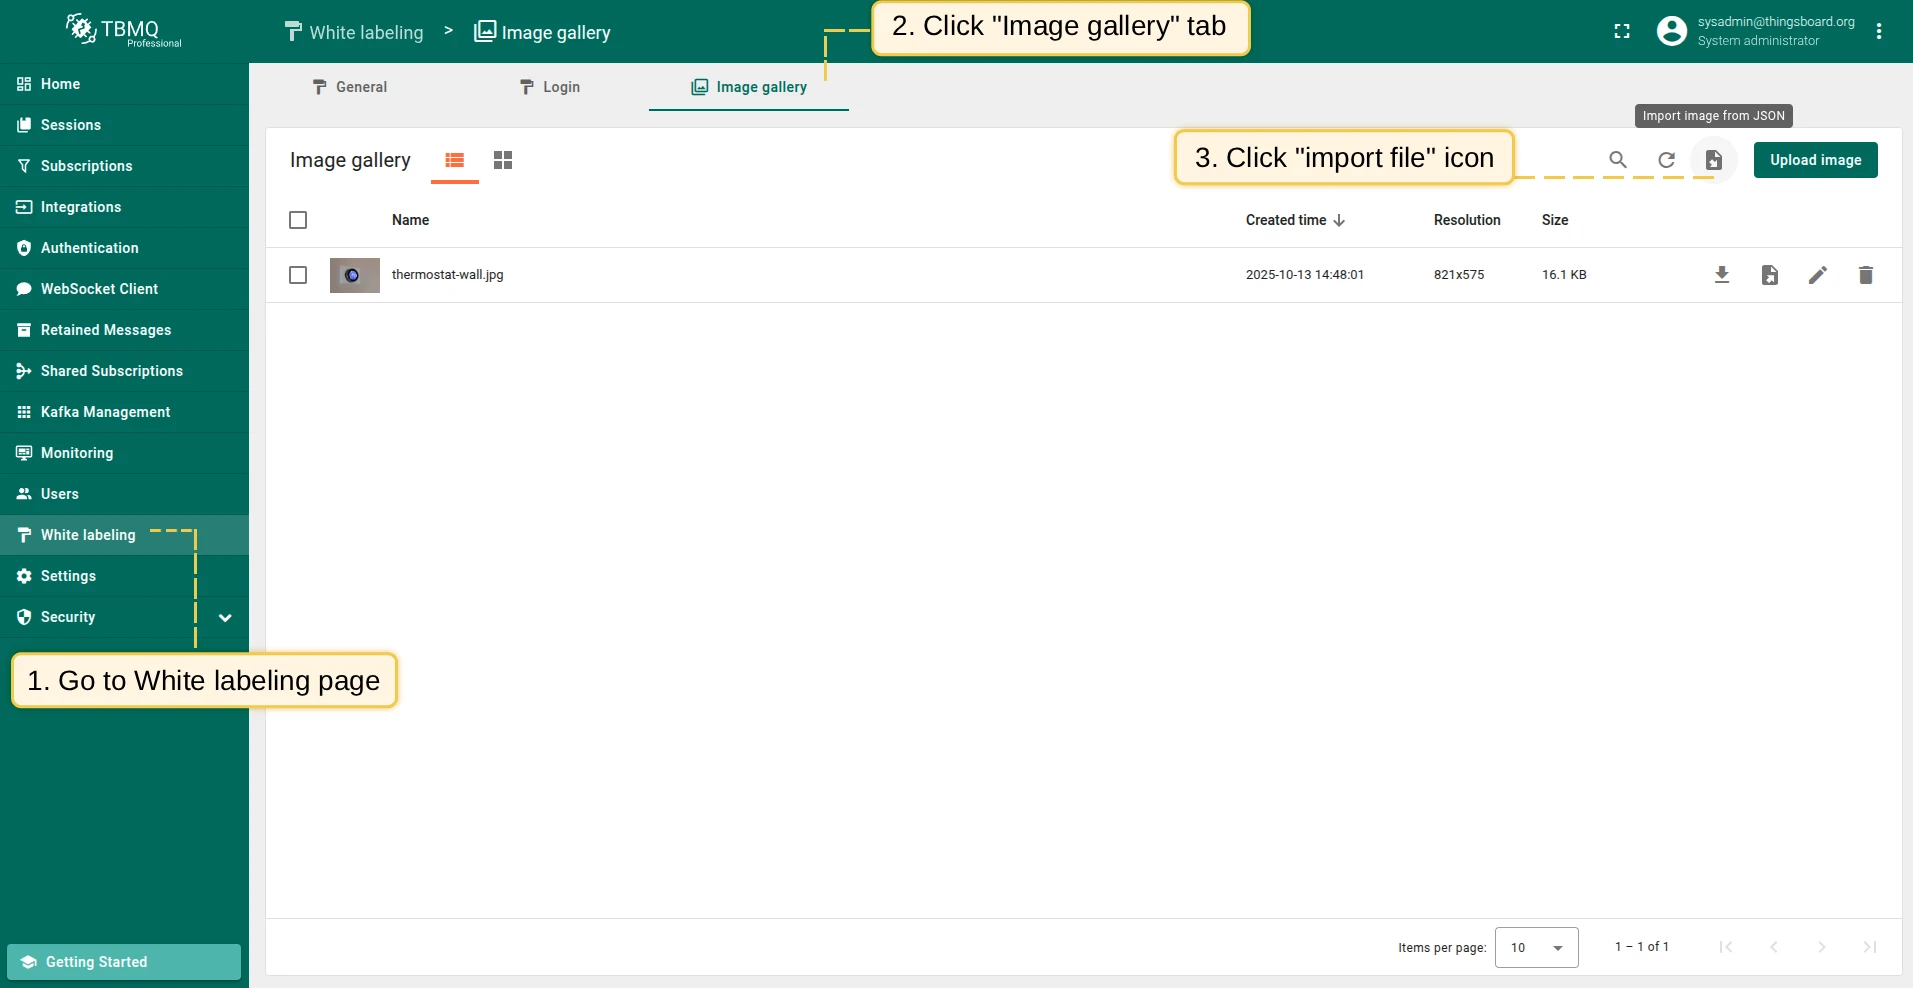
Go to the White labeling page and click the Image gallery tab. Then click the Import image icon in the top right corner.
-
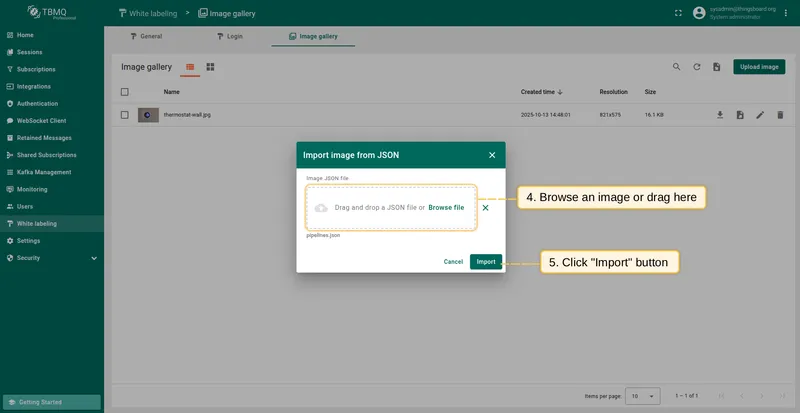
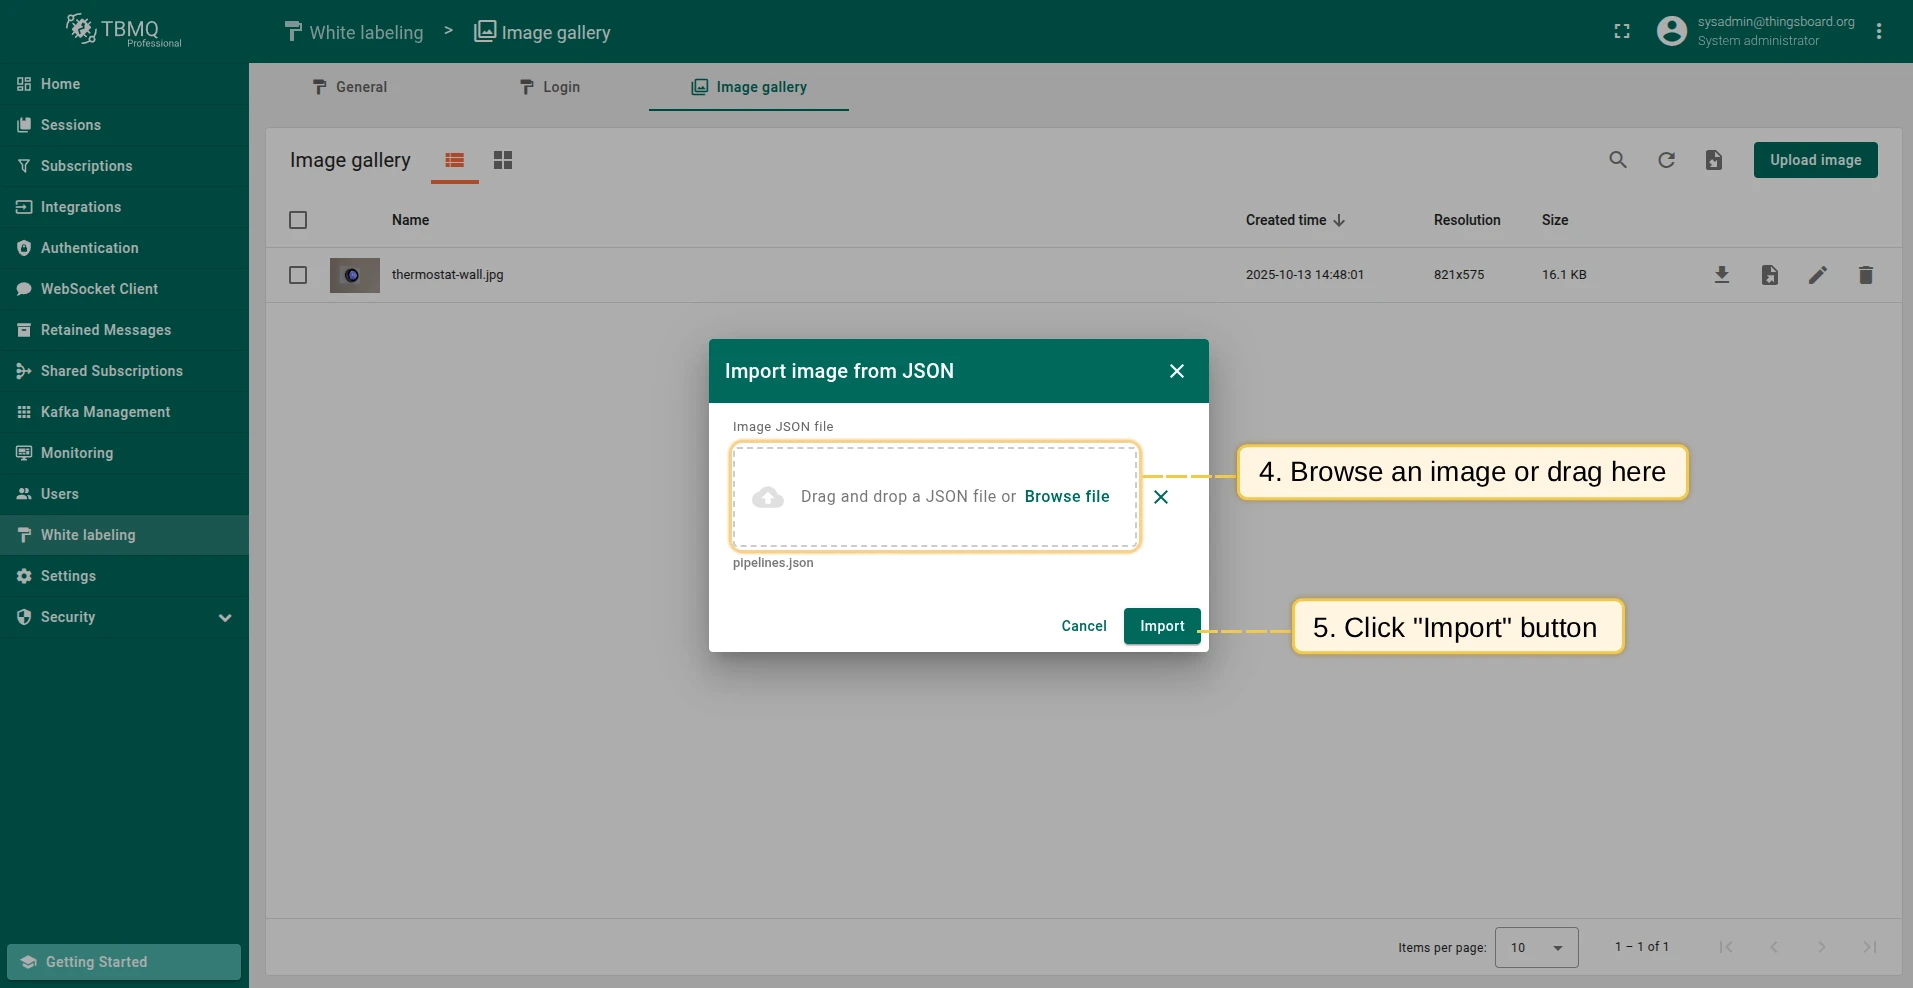
In the Import image window, upload a JSON image file and click Import.
-
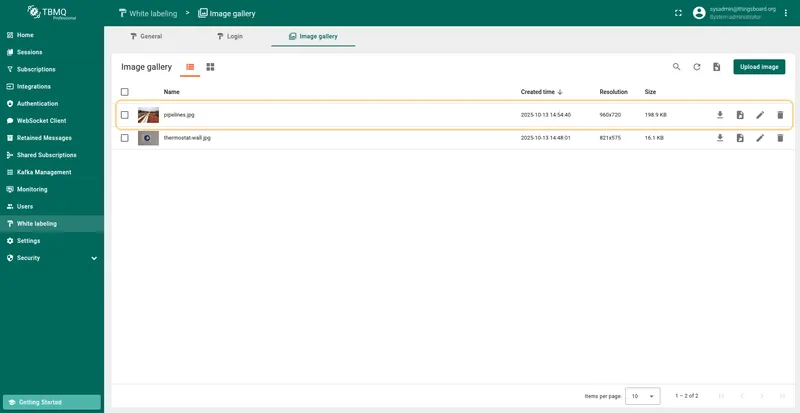
The image has been imported.
Change the image view mode
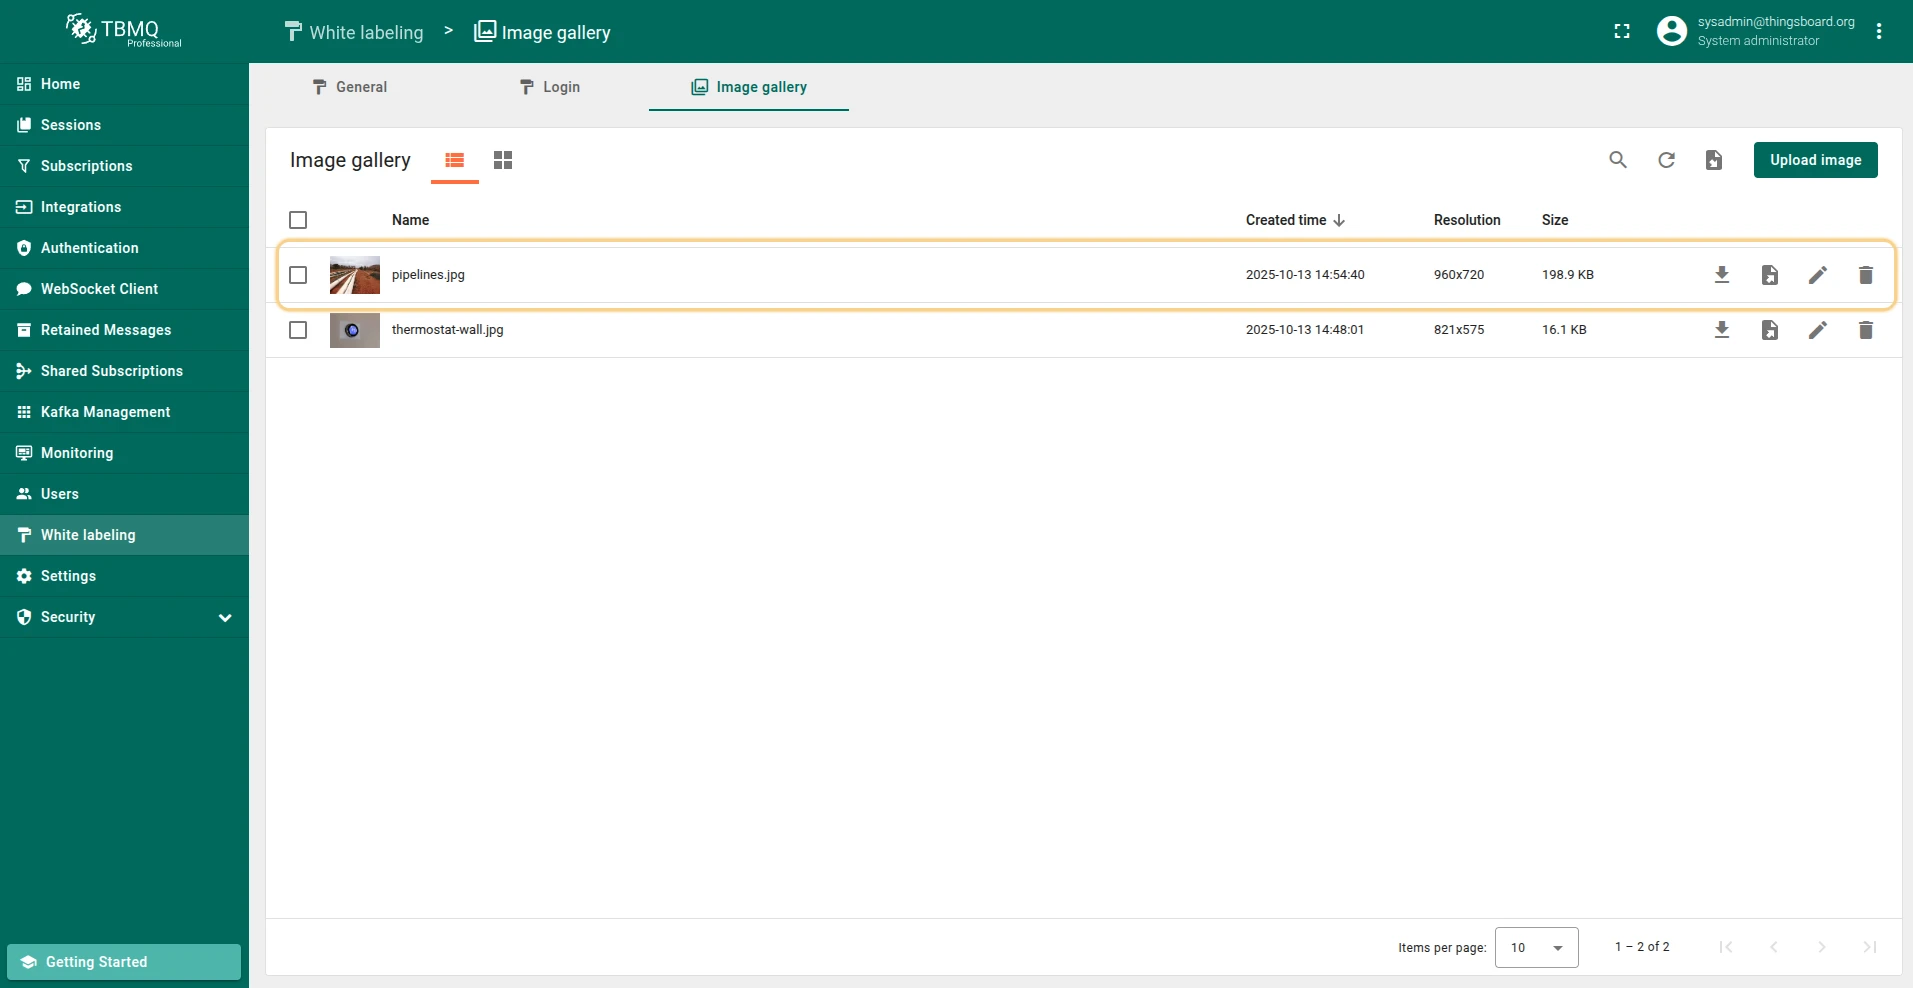
Section titled “Change the image view mode”Images can be viewed in list or grid mode. To switch, select the preferred mode in the top left corner of the Image Gallery.
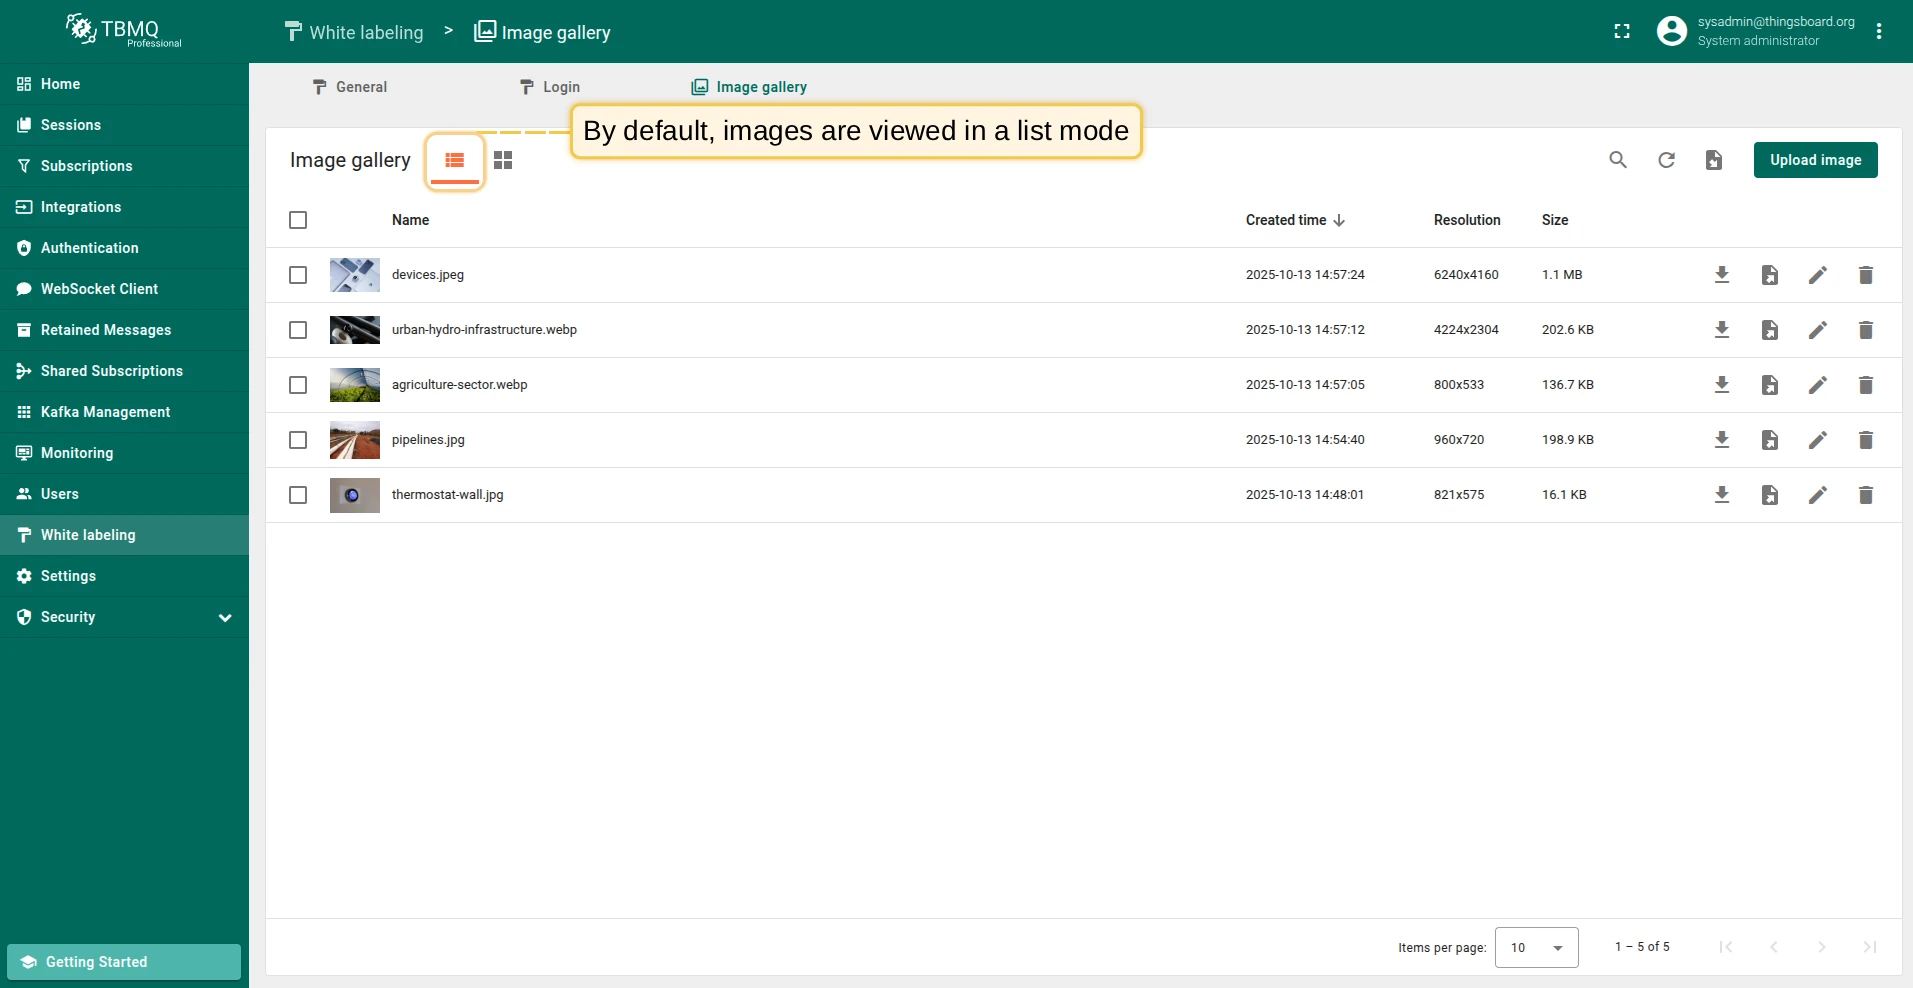
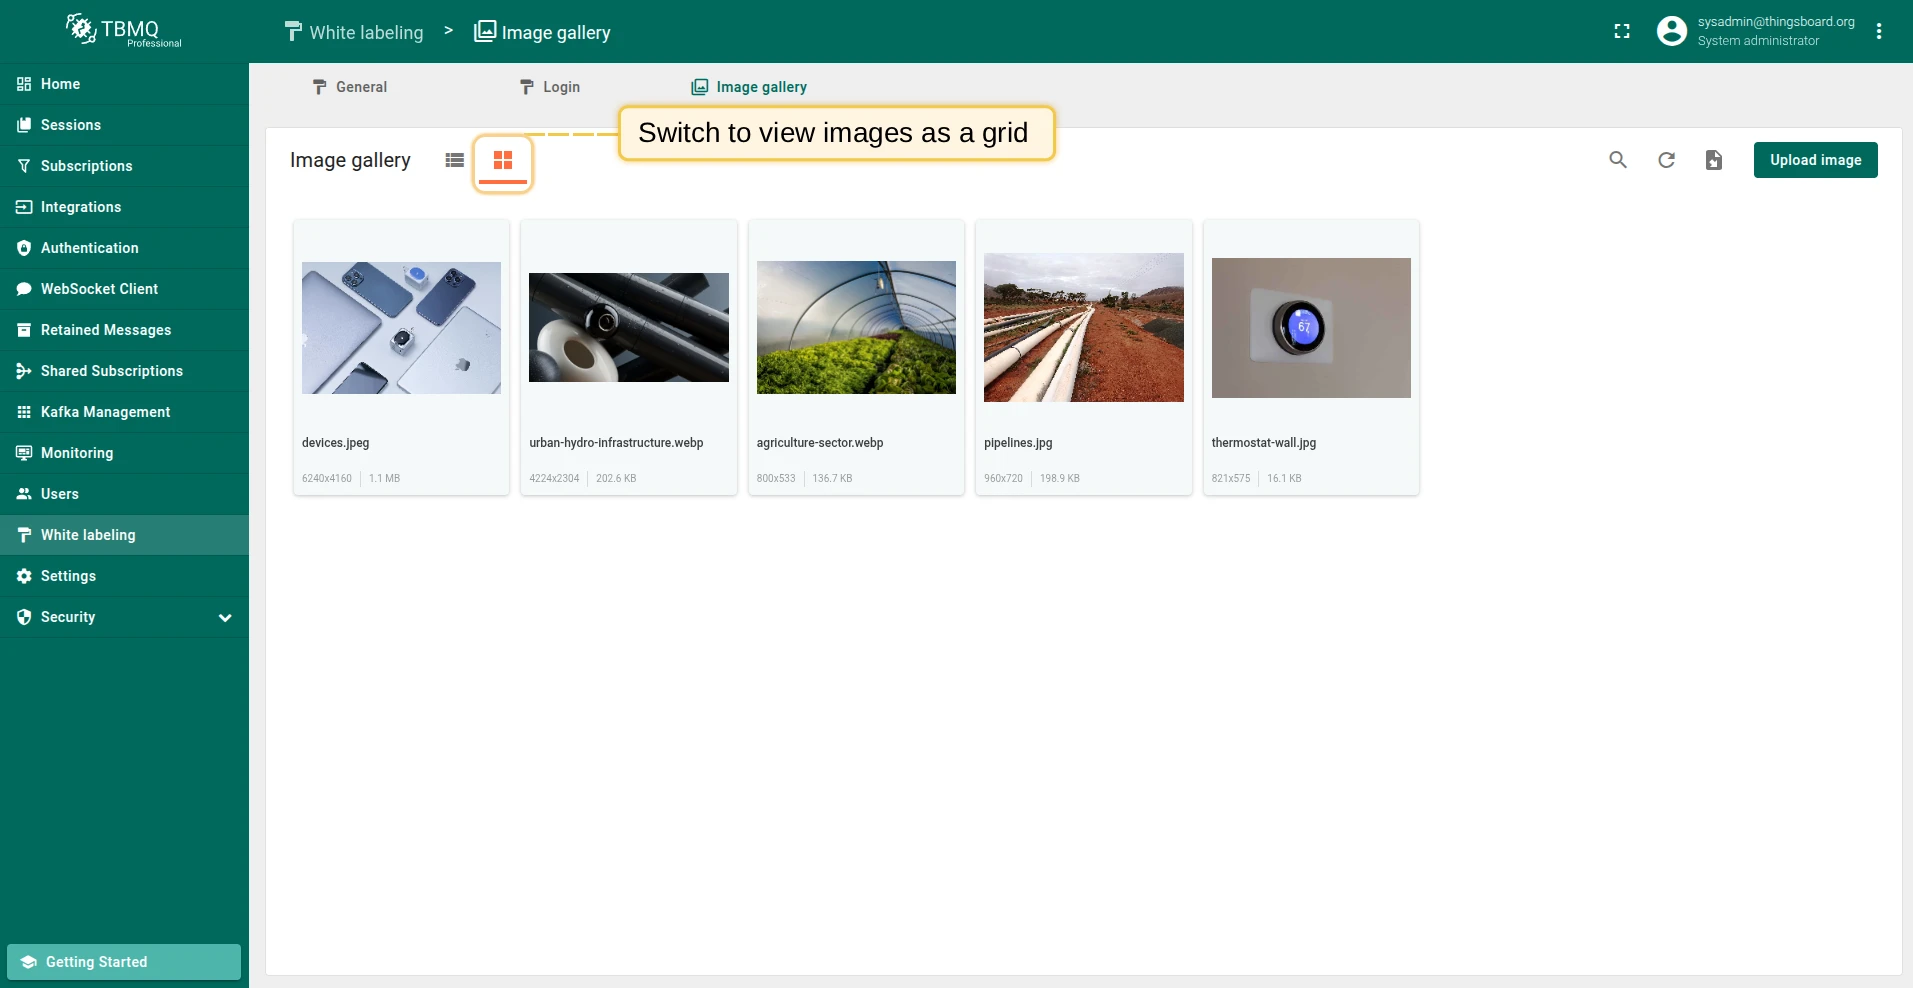
Image operations
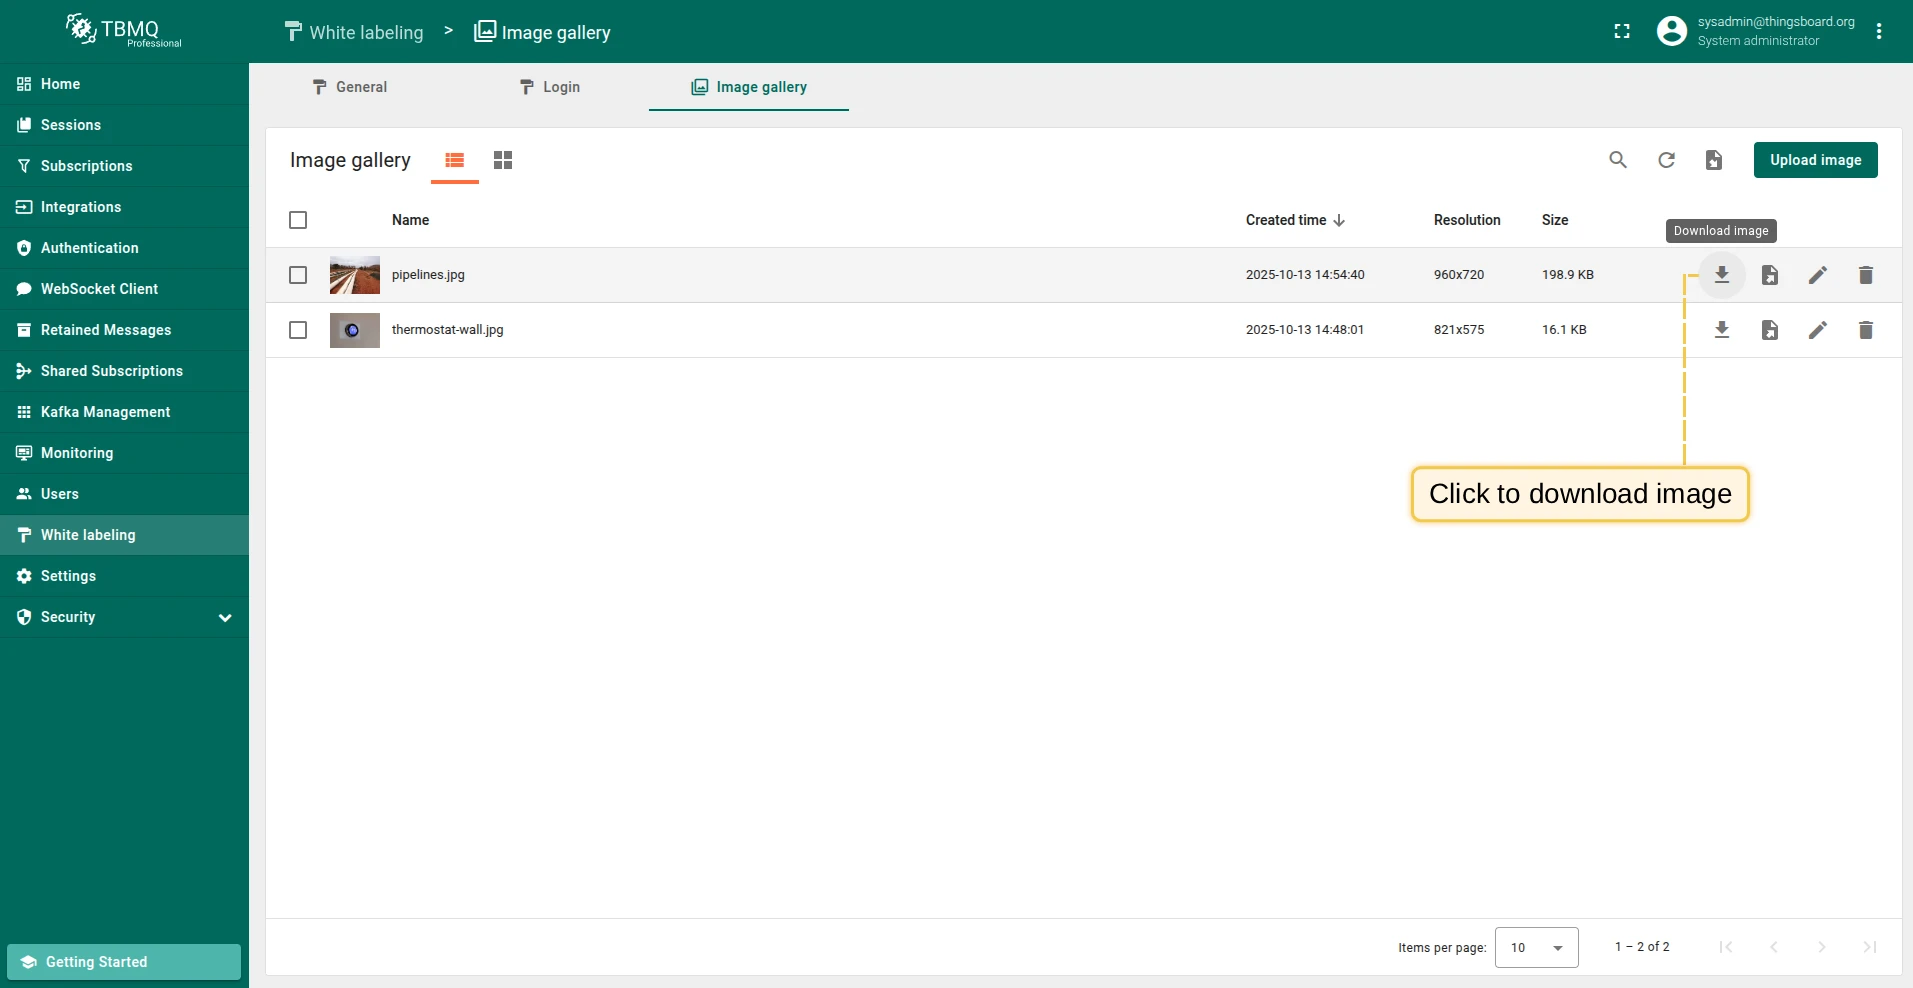
Section titled “Image operations”Each image supports the following operations via the icons next to the image name: download, export to JSON, edit, and delete.
Download image
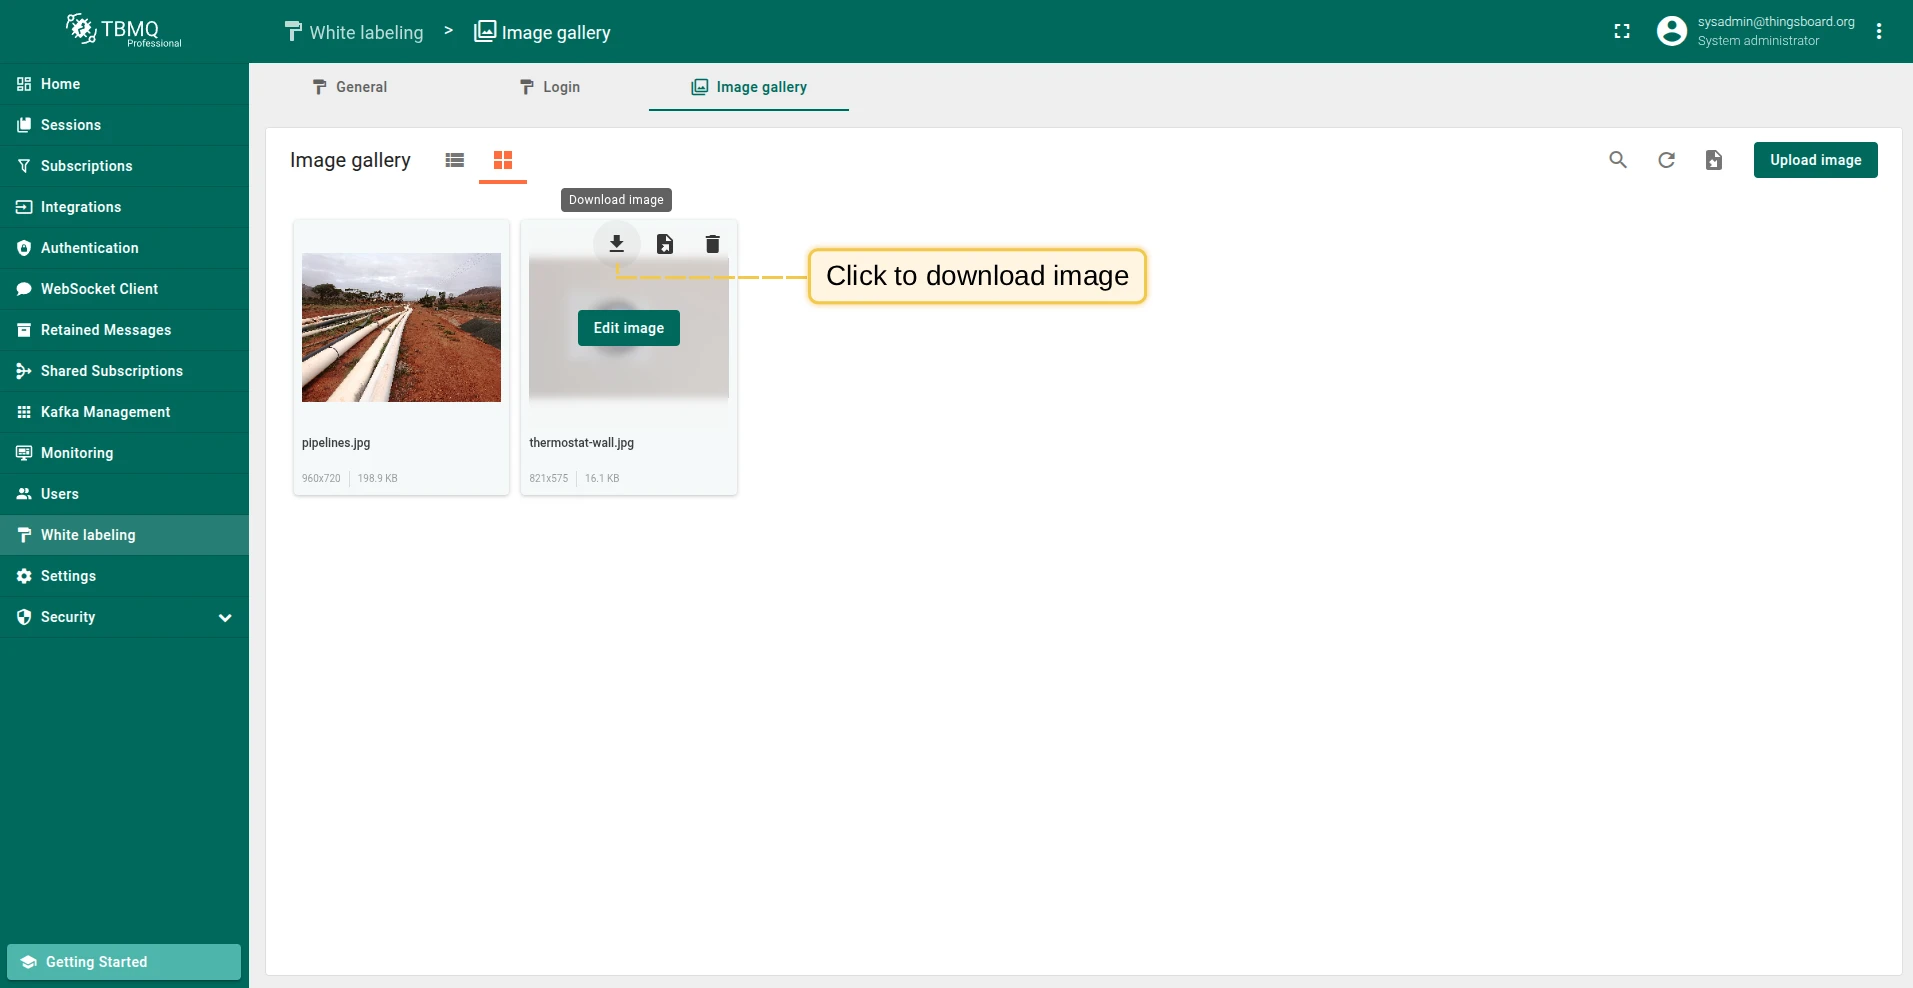
Section titled “Download image”Download an image in image file format — the method depends on the current view mode:
- List view — click the Download image icon next to the image name.
- Grid view — hover over the image and click the Download image icon.
The image file will be saved to your computer.
Export image to JSON
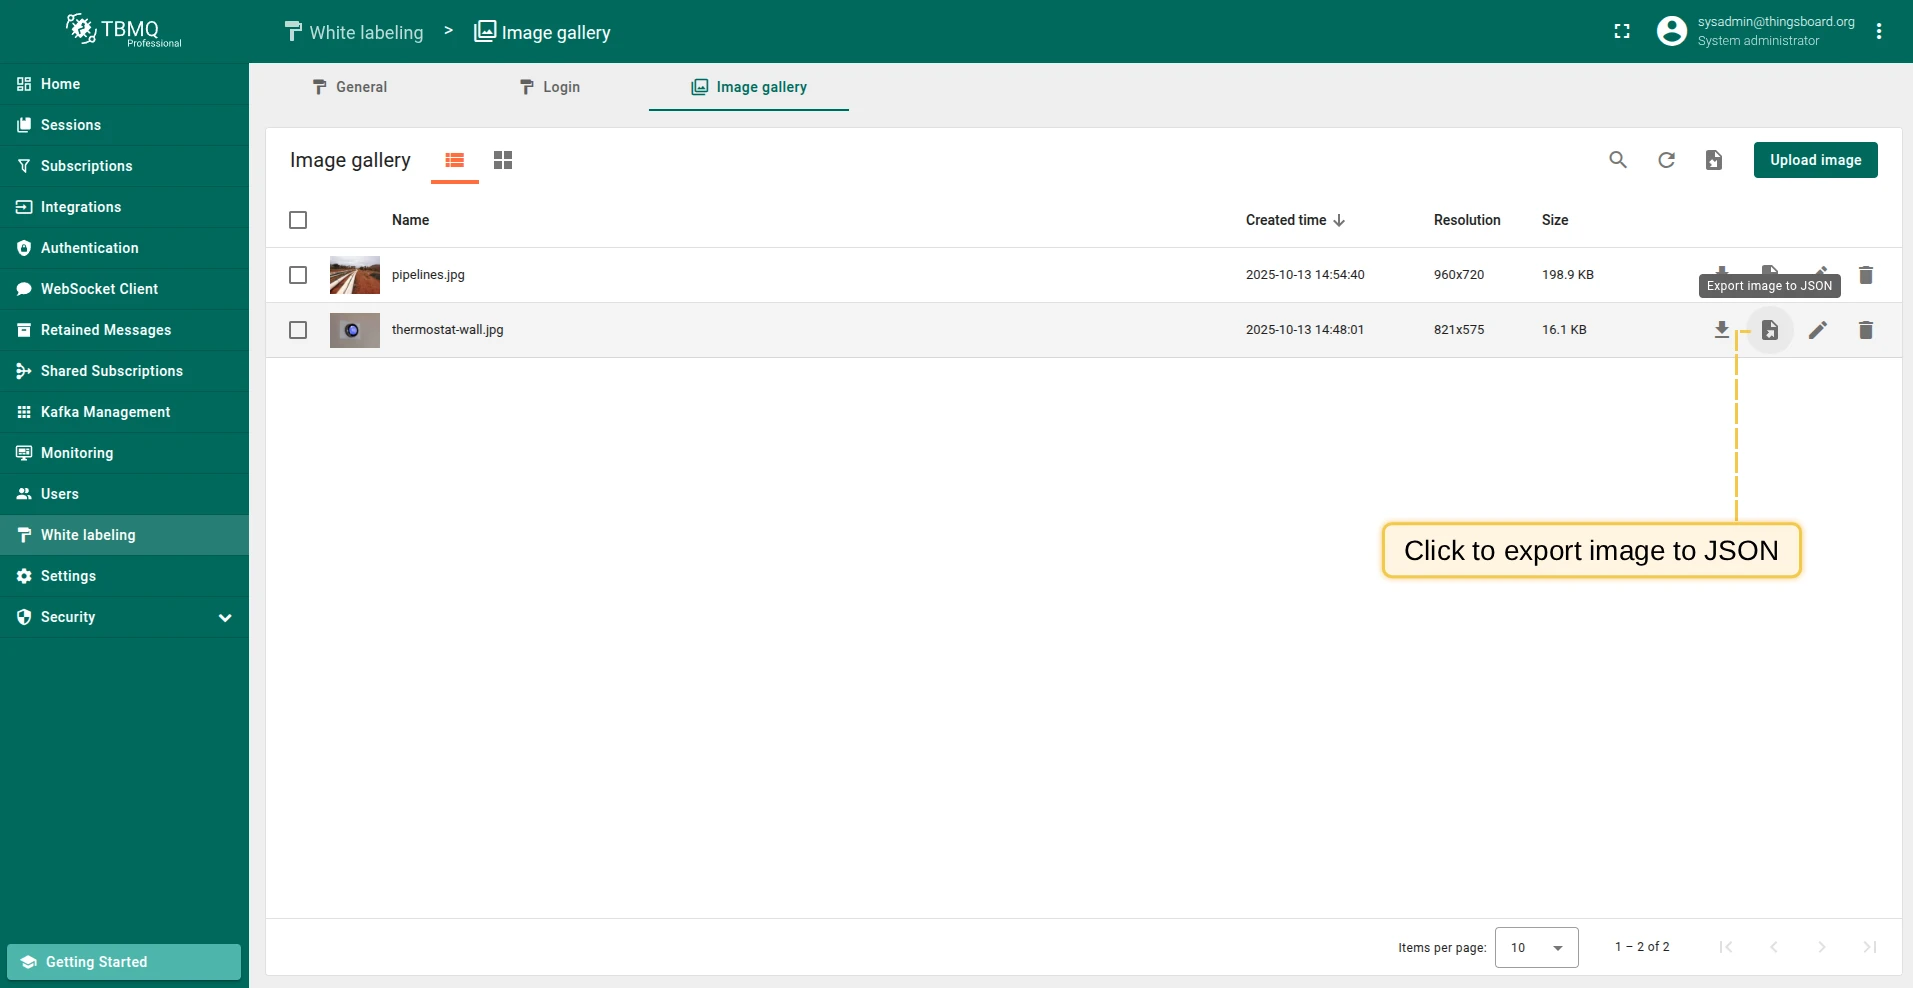
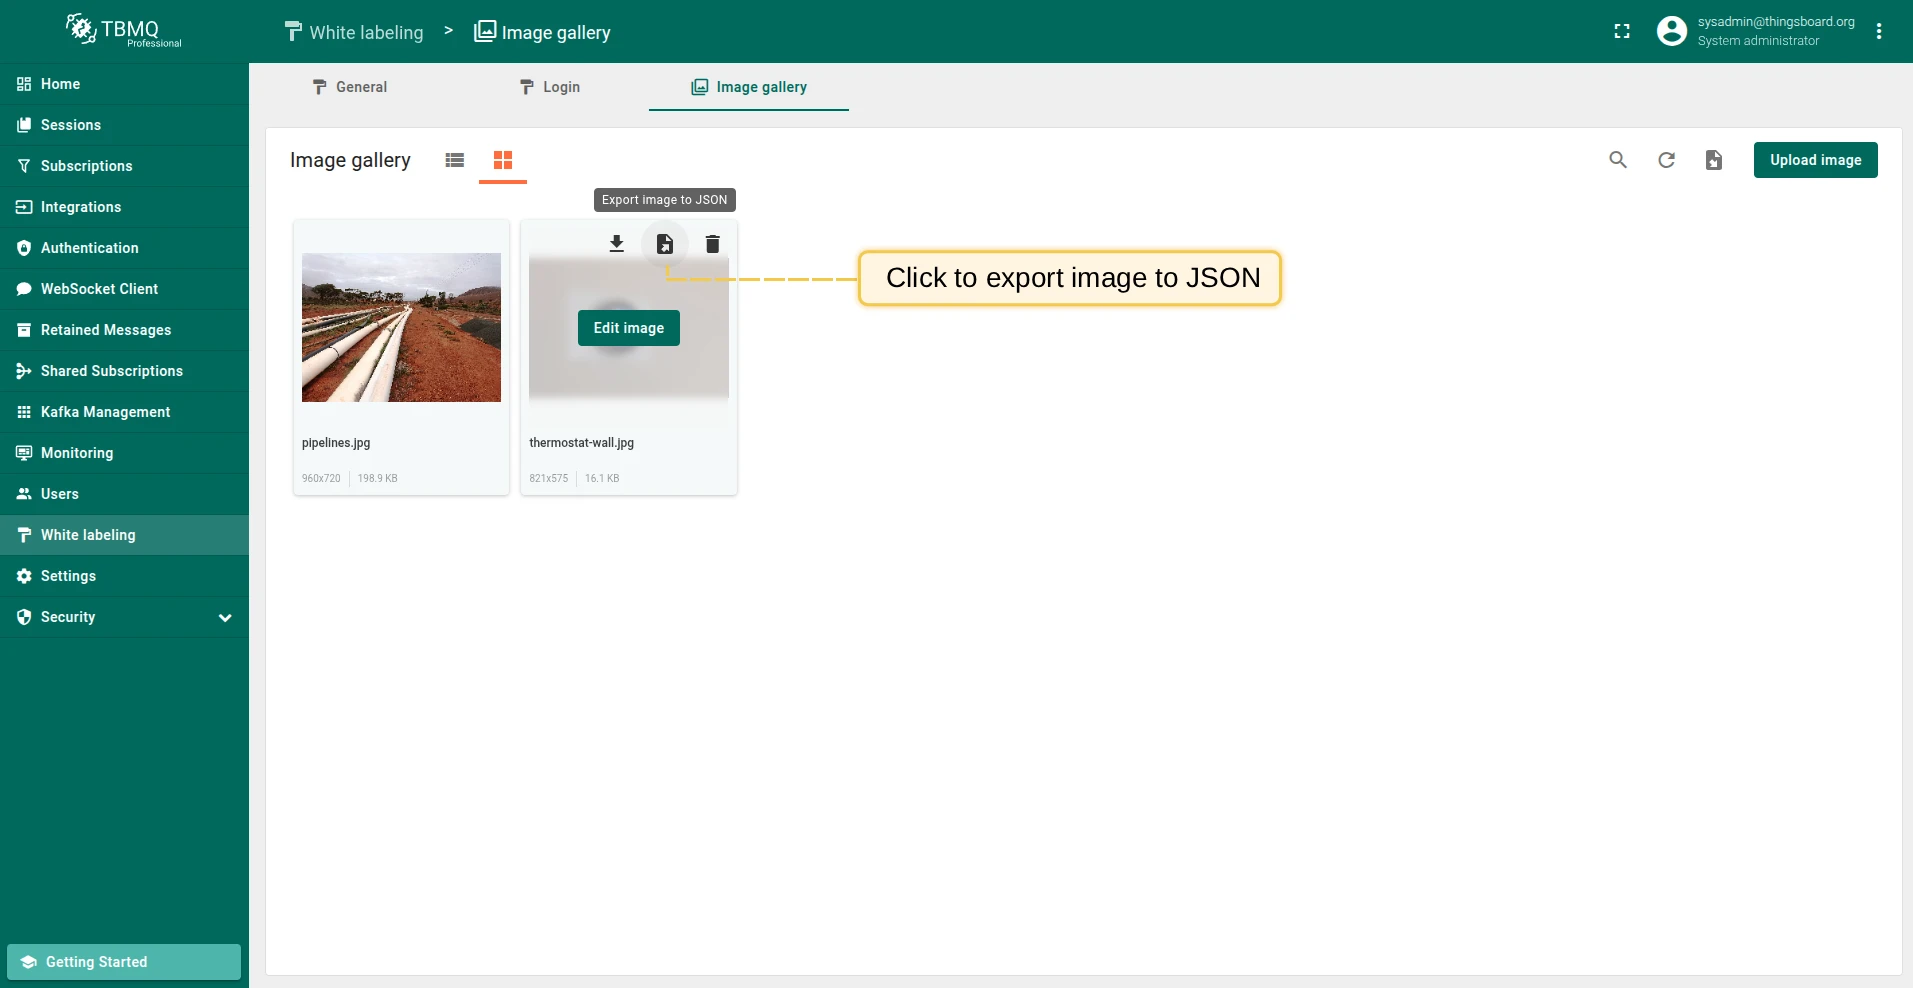
Section titled “Export image to JSON”Export an image to JSON — the method depends on the current view mode:
- List view — click the Export image to JSON icon next to the image name.
- Grid view — hover over the image and click the Export image to JSON icon.
The JSON file will be saved to your computer.
Edit image
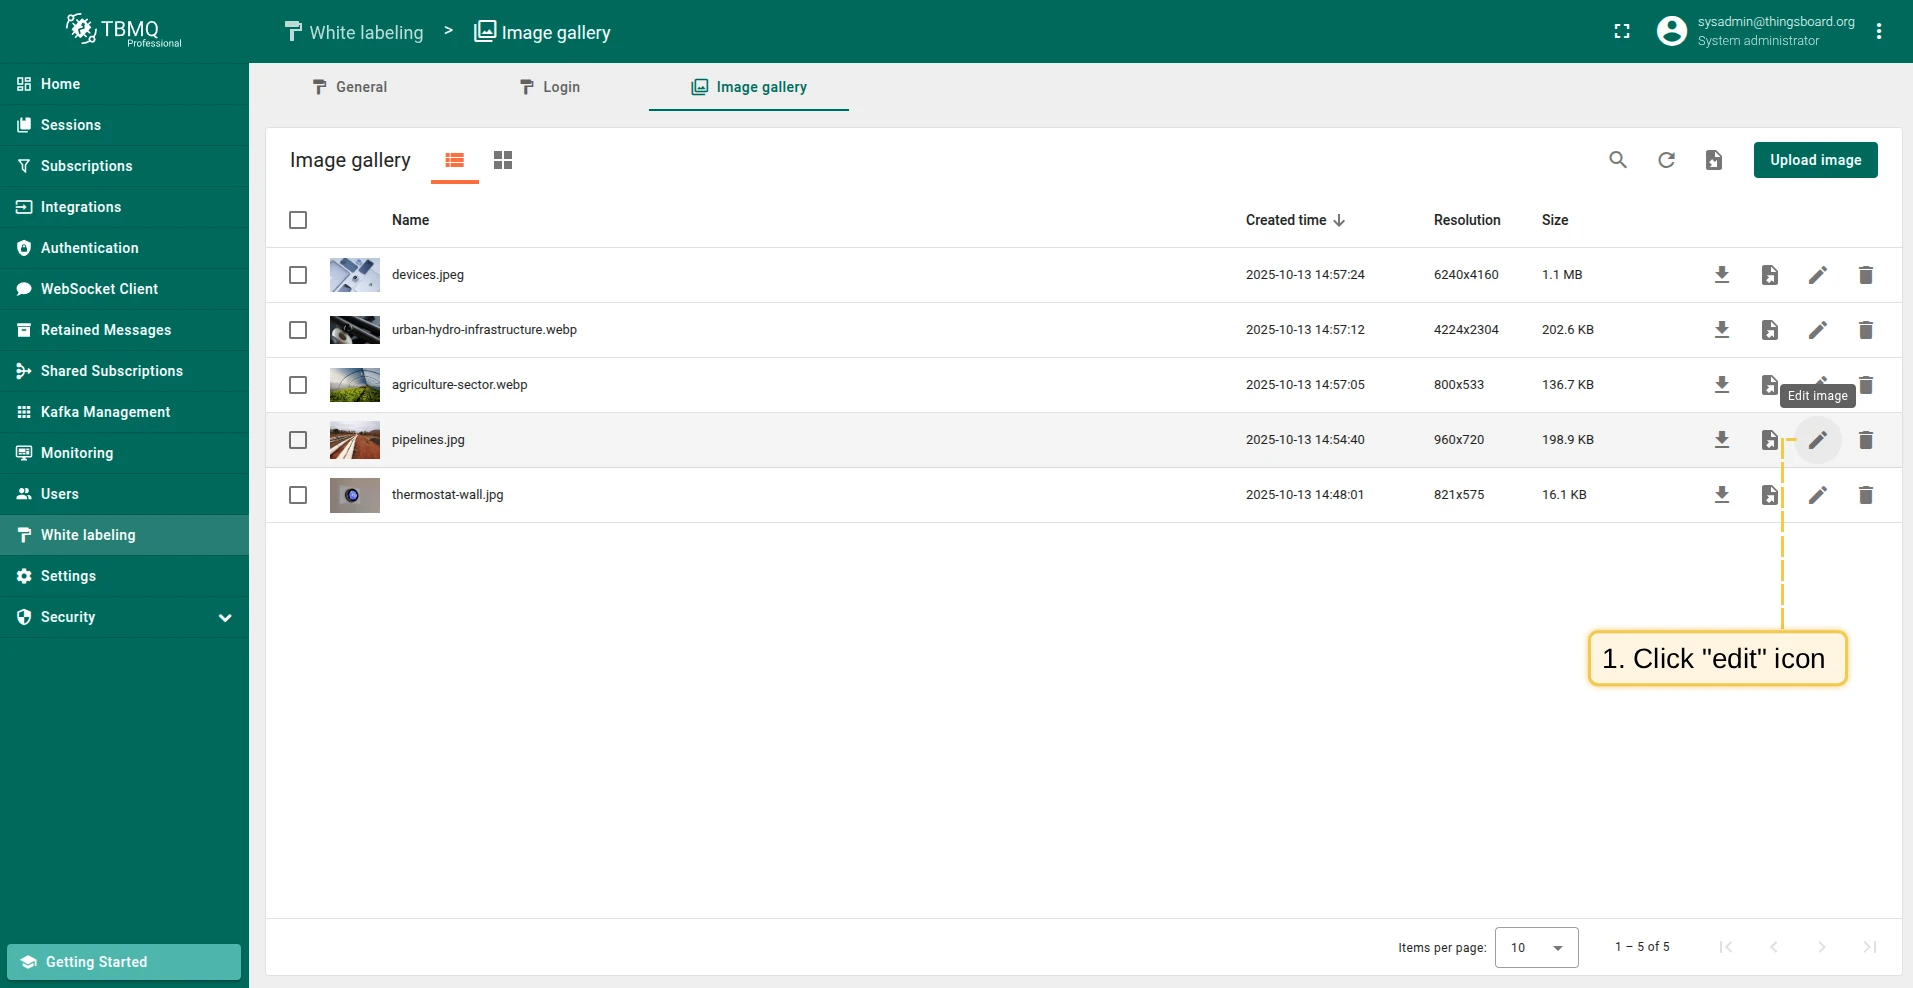
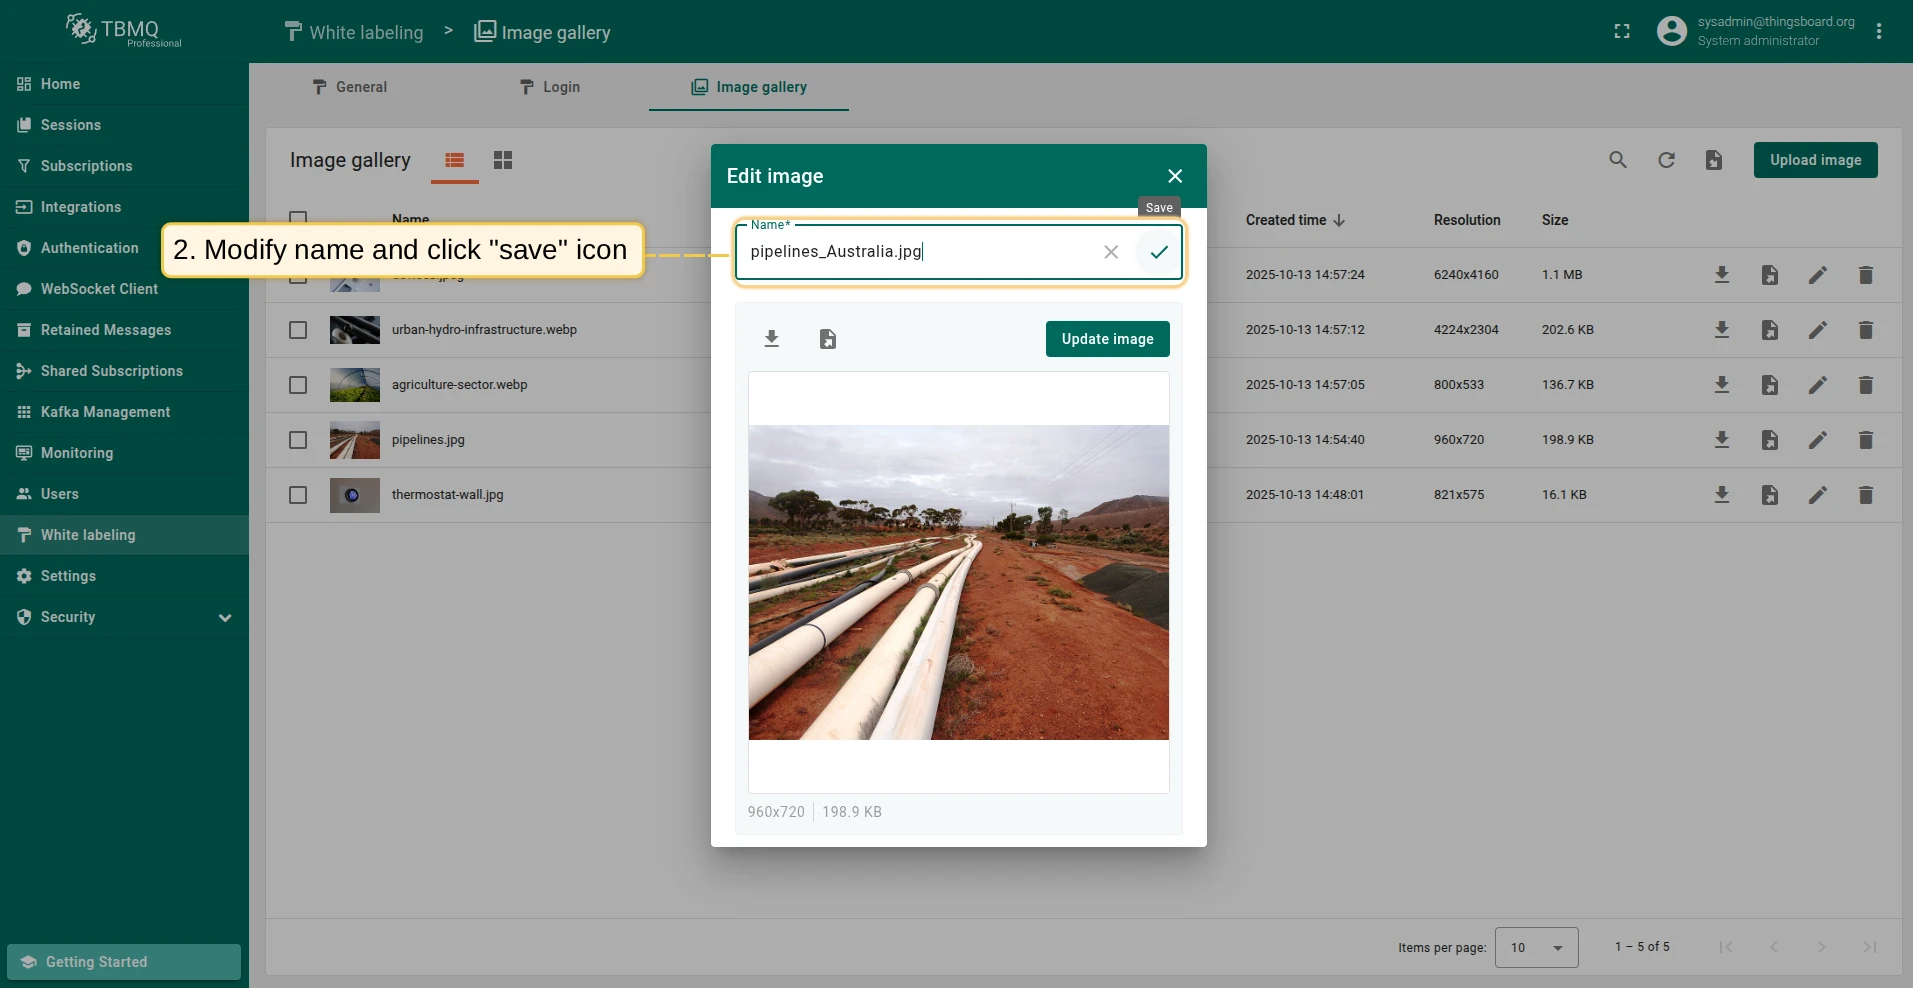
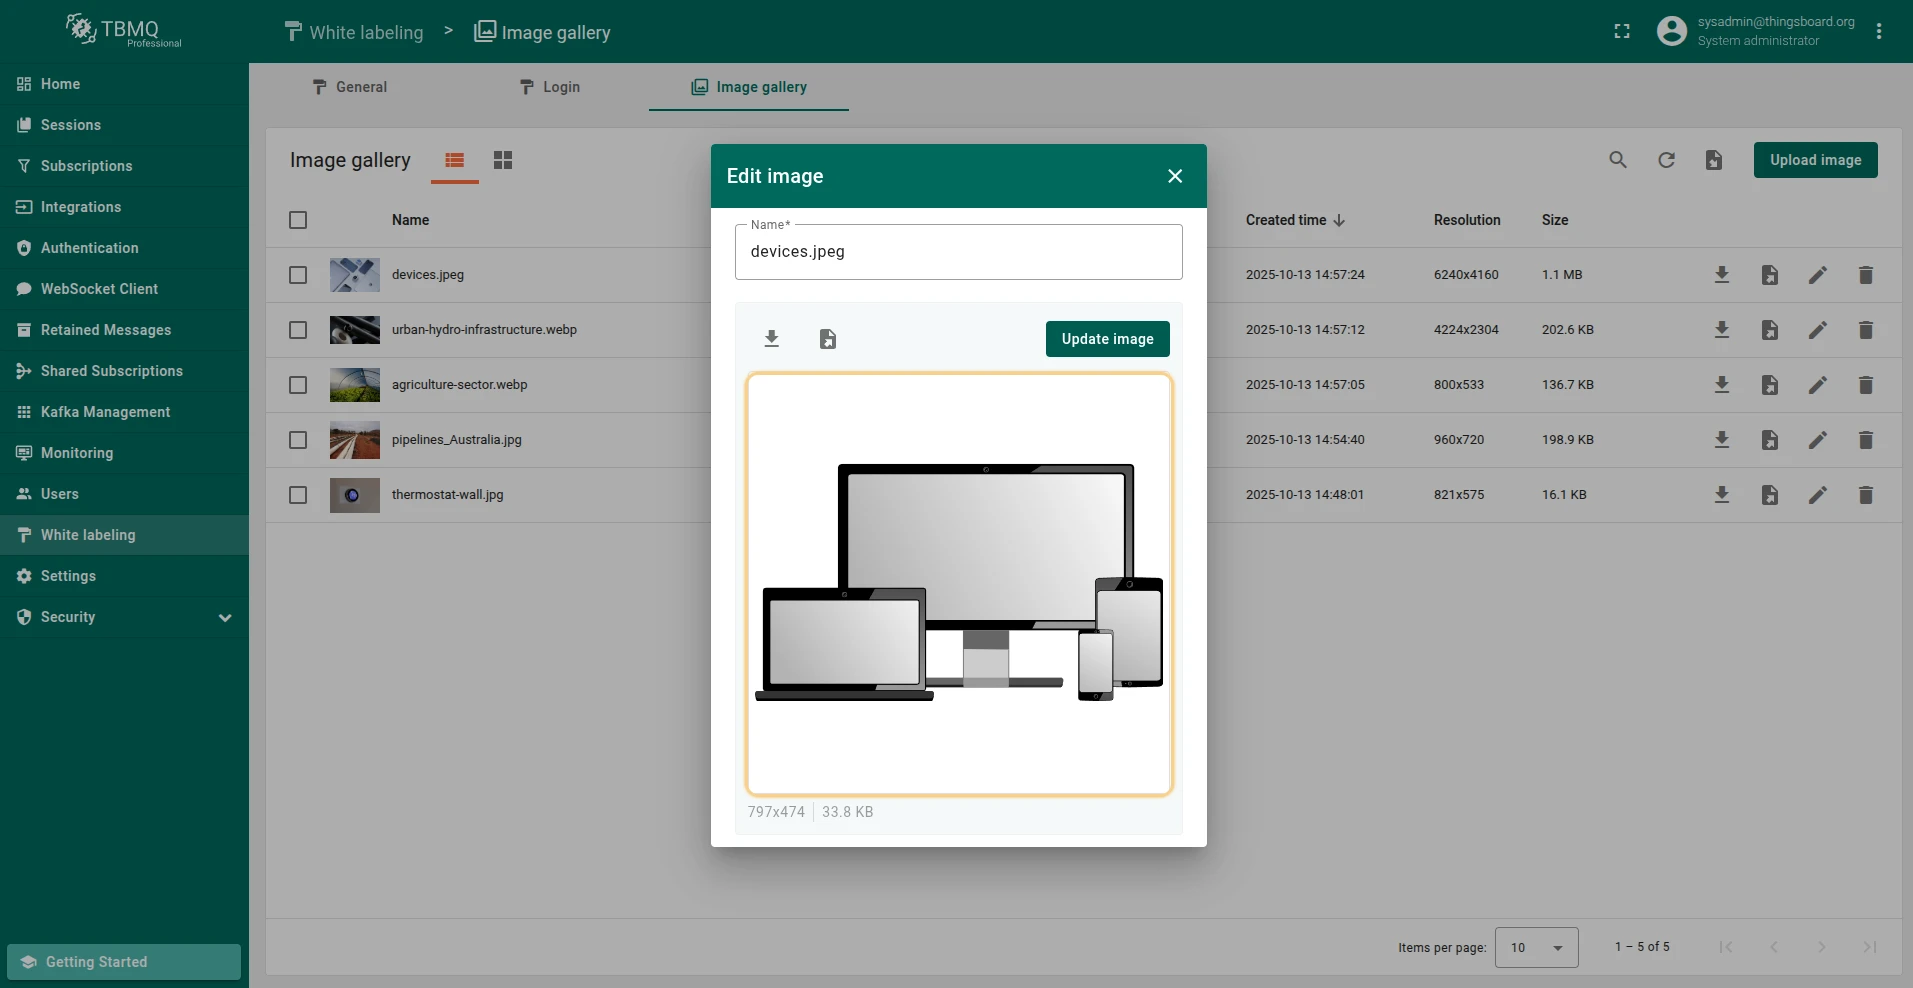
Section titled “Edit image”To open the editing window, click the Edit image icon next to the image name (in grid view, hover over the image first). From this window you can rename the image, download it, export it to JSON, or update it.
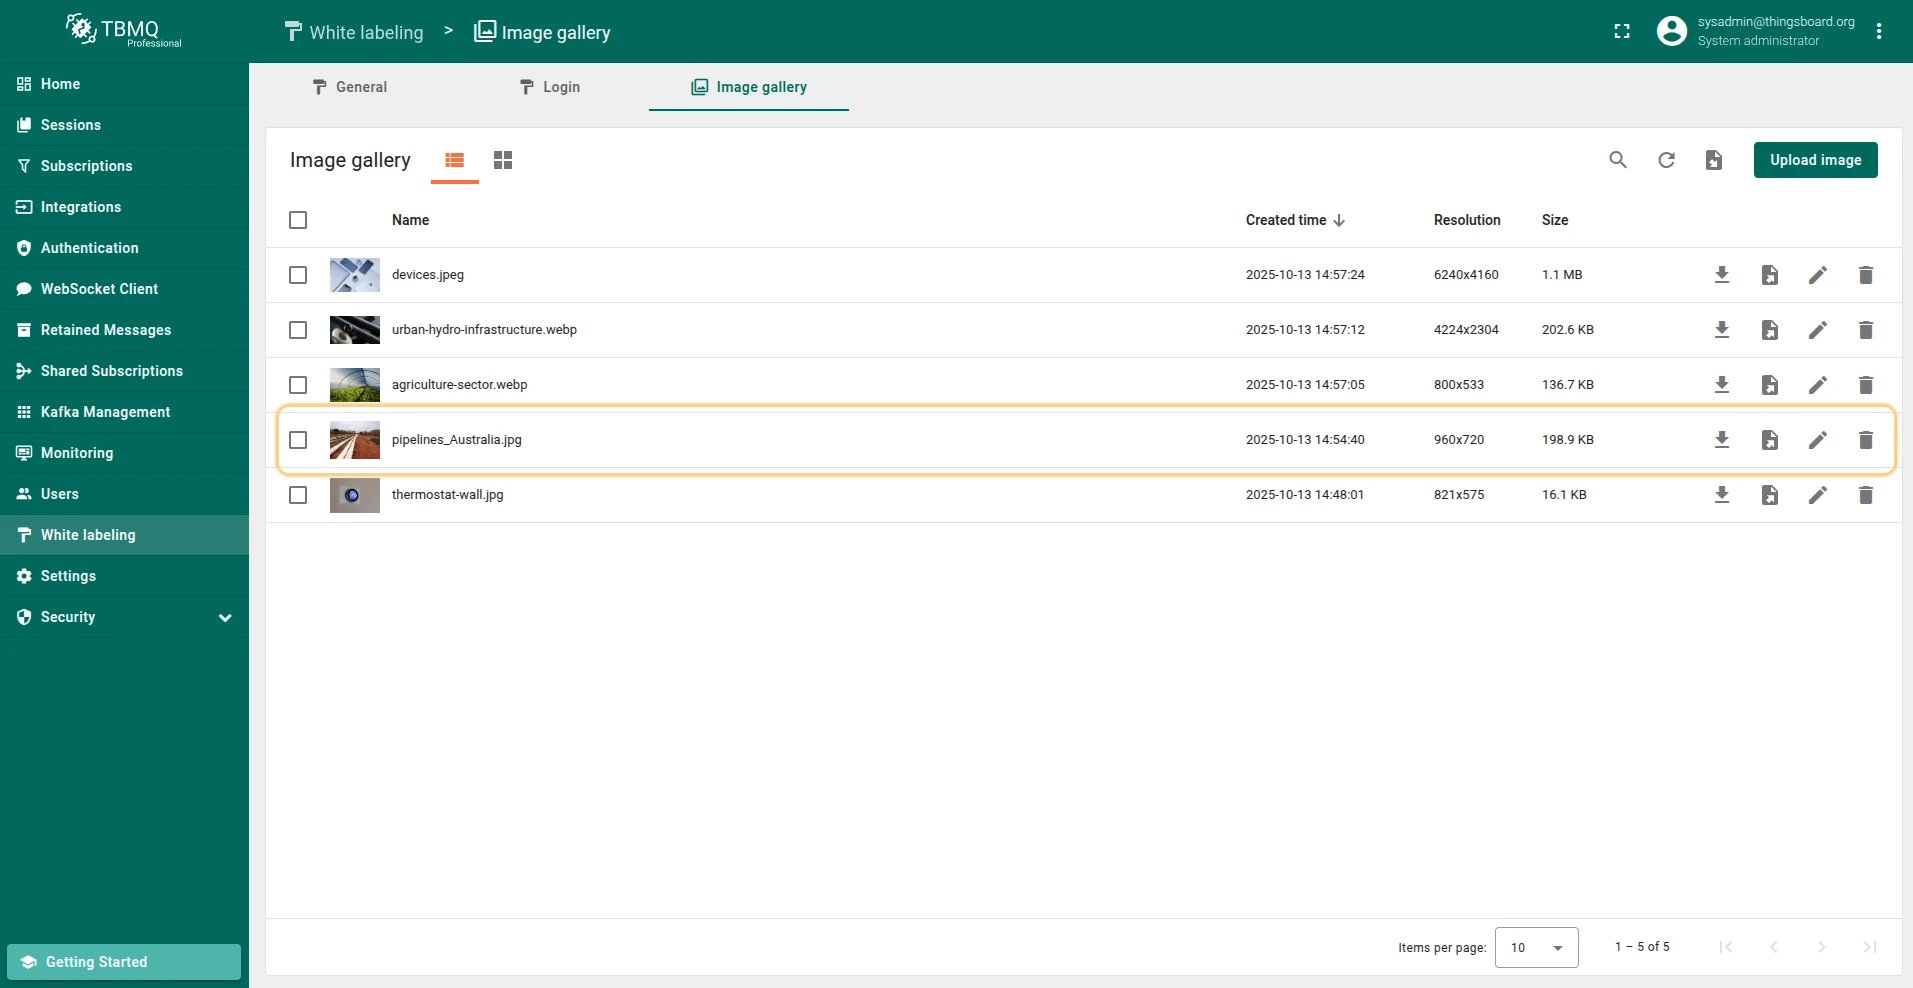
To rename an image, enter a new name in the editing window and click the Save icon.
Update image
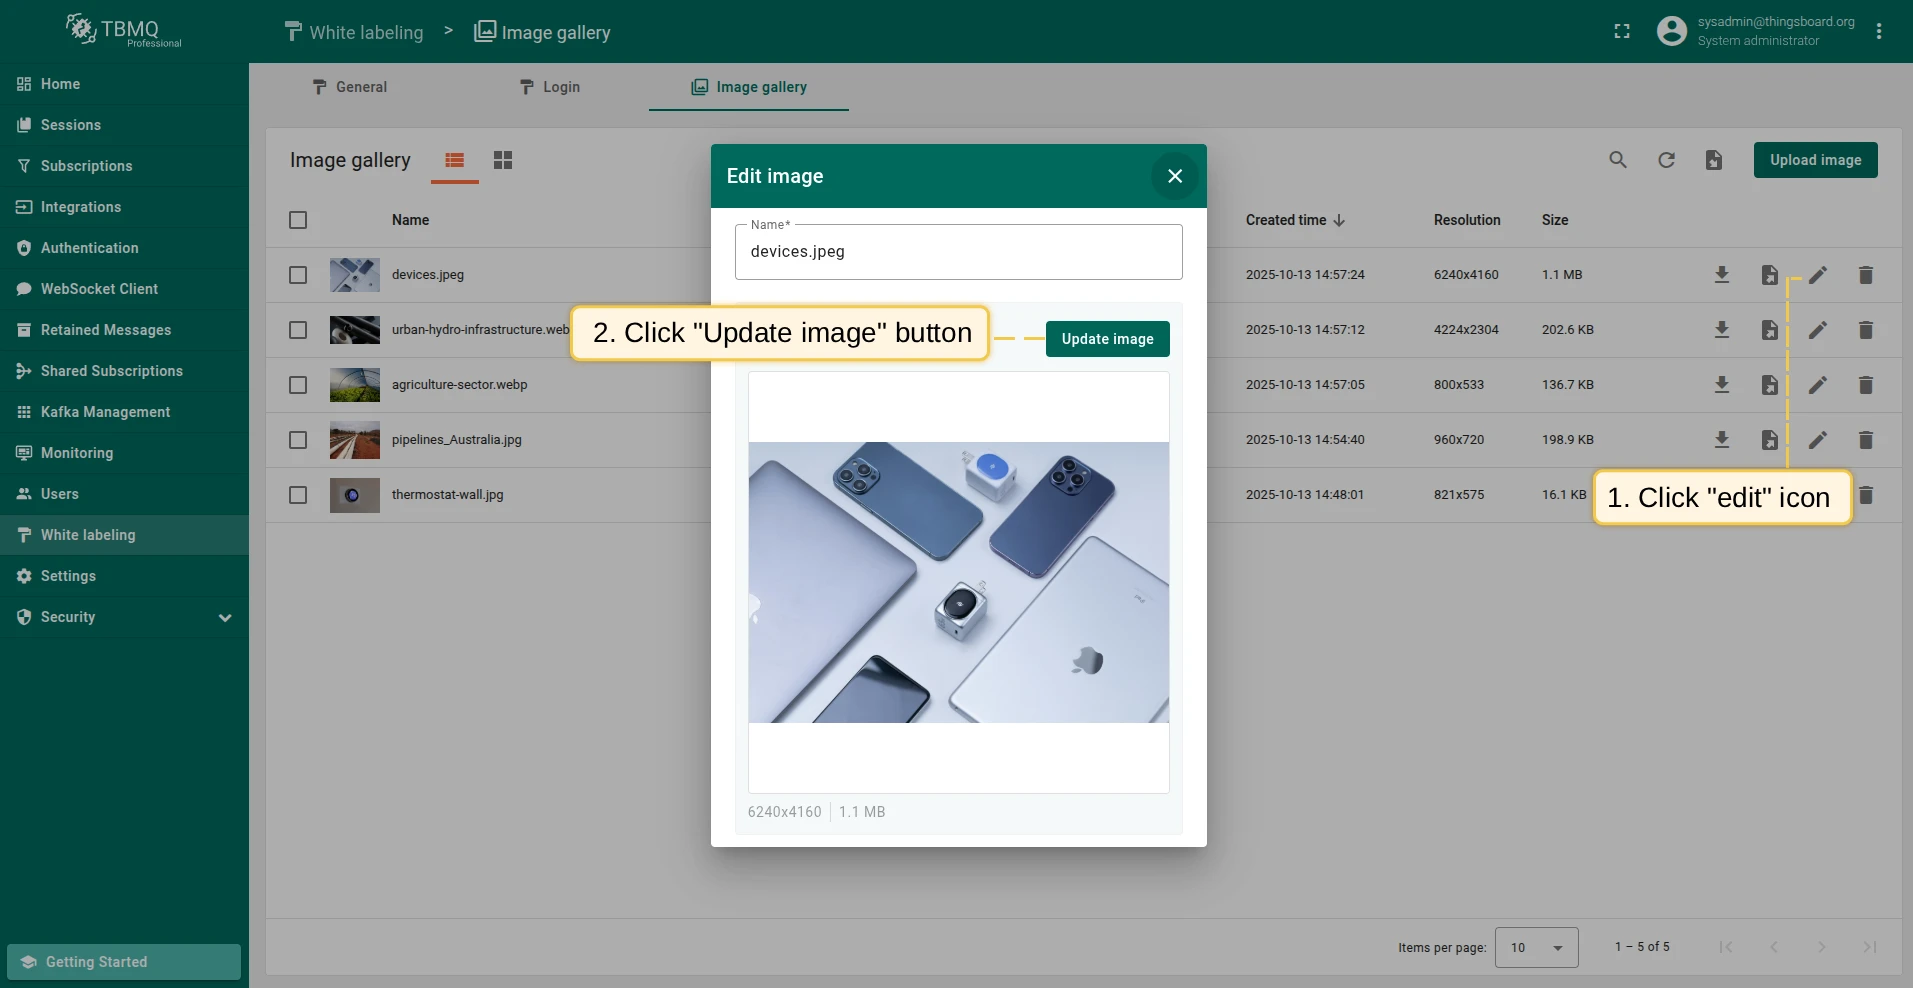
Section titled “Update image”Updating an image is useful when one image serves as the background or logo in multiple places — updating it once propagates the change everywhere automatically.
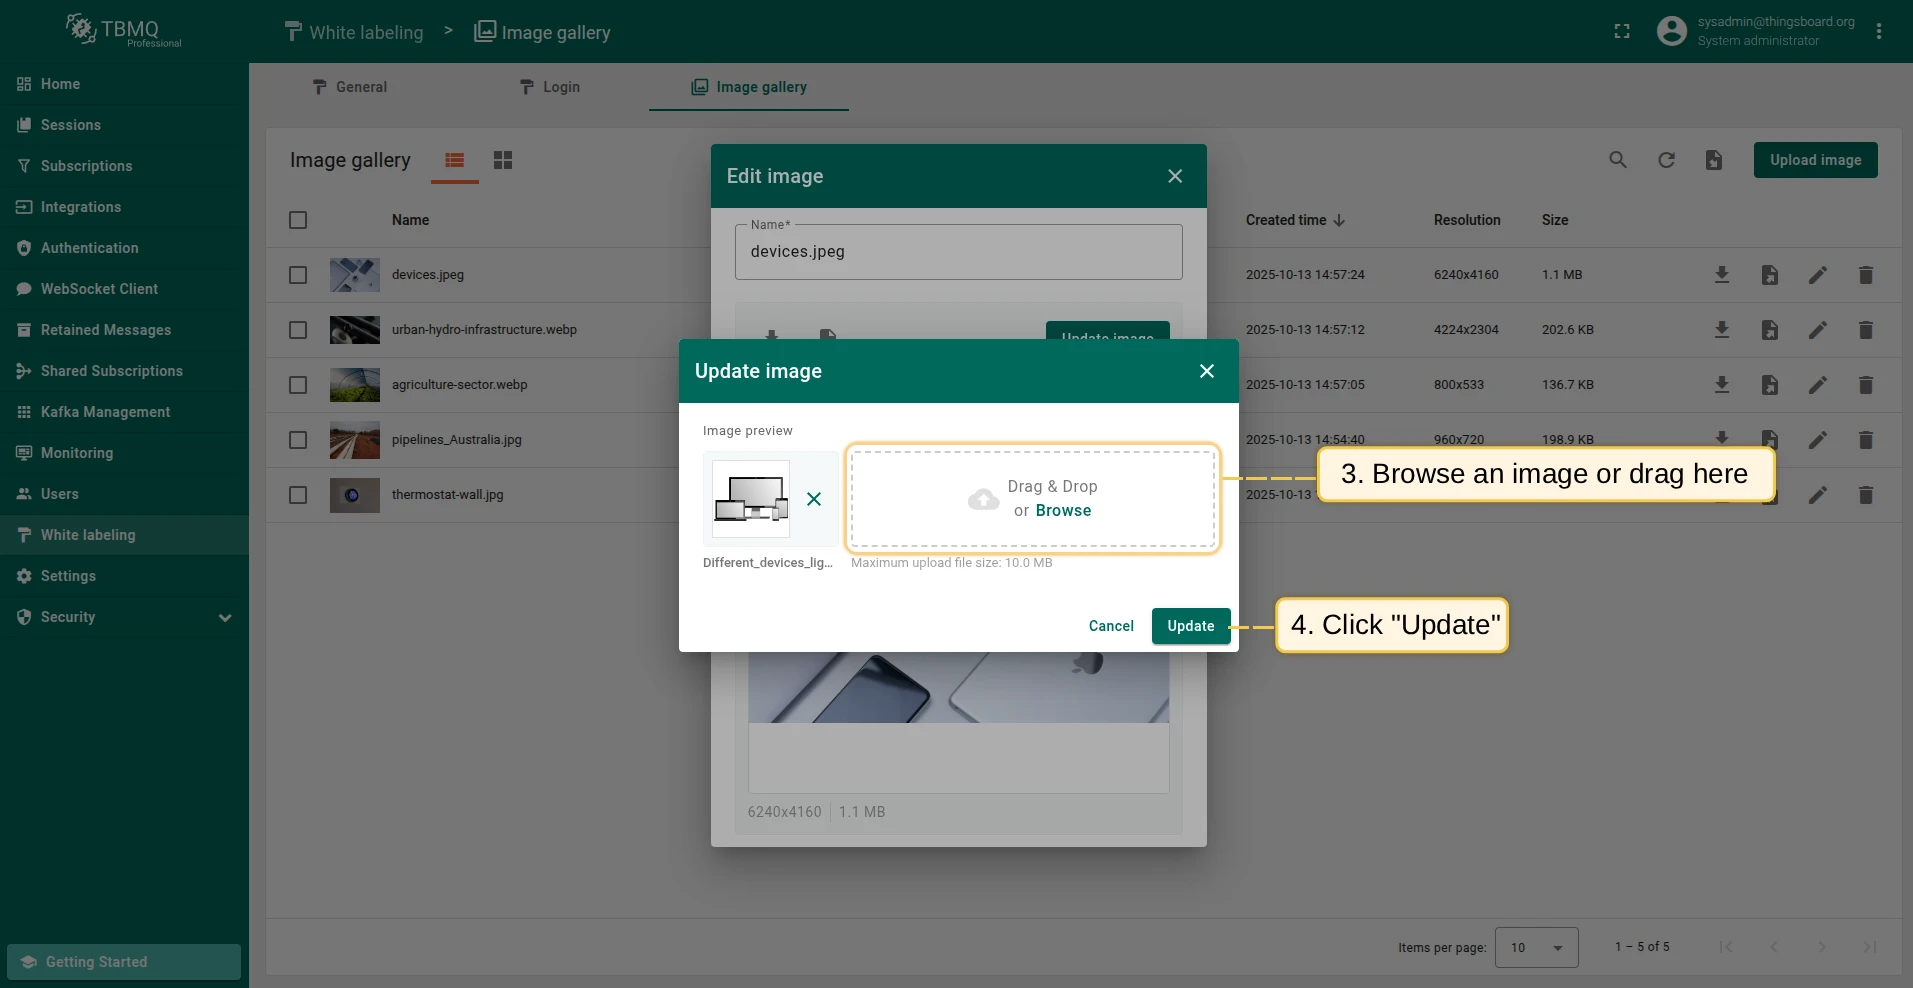
To update an image, click Update image in the editing window. Select a new image or drag it into the window and click Update.
Delete image
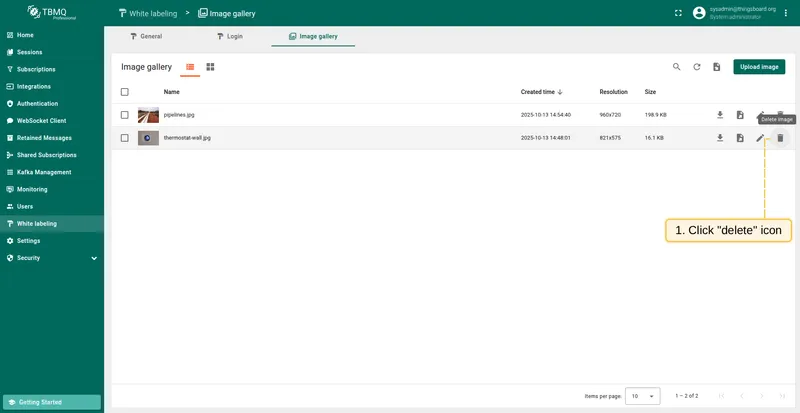
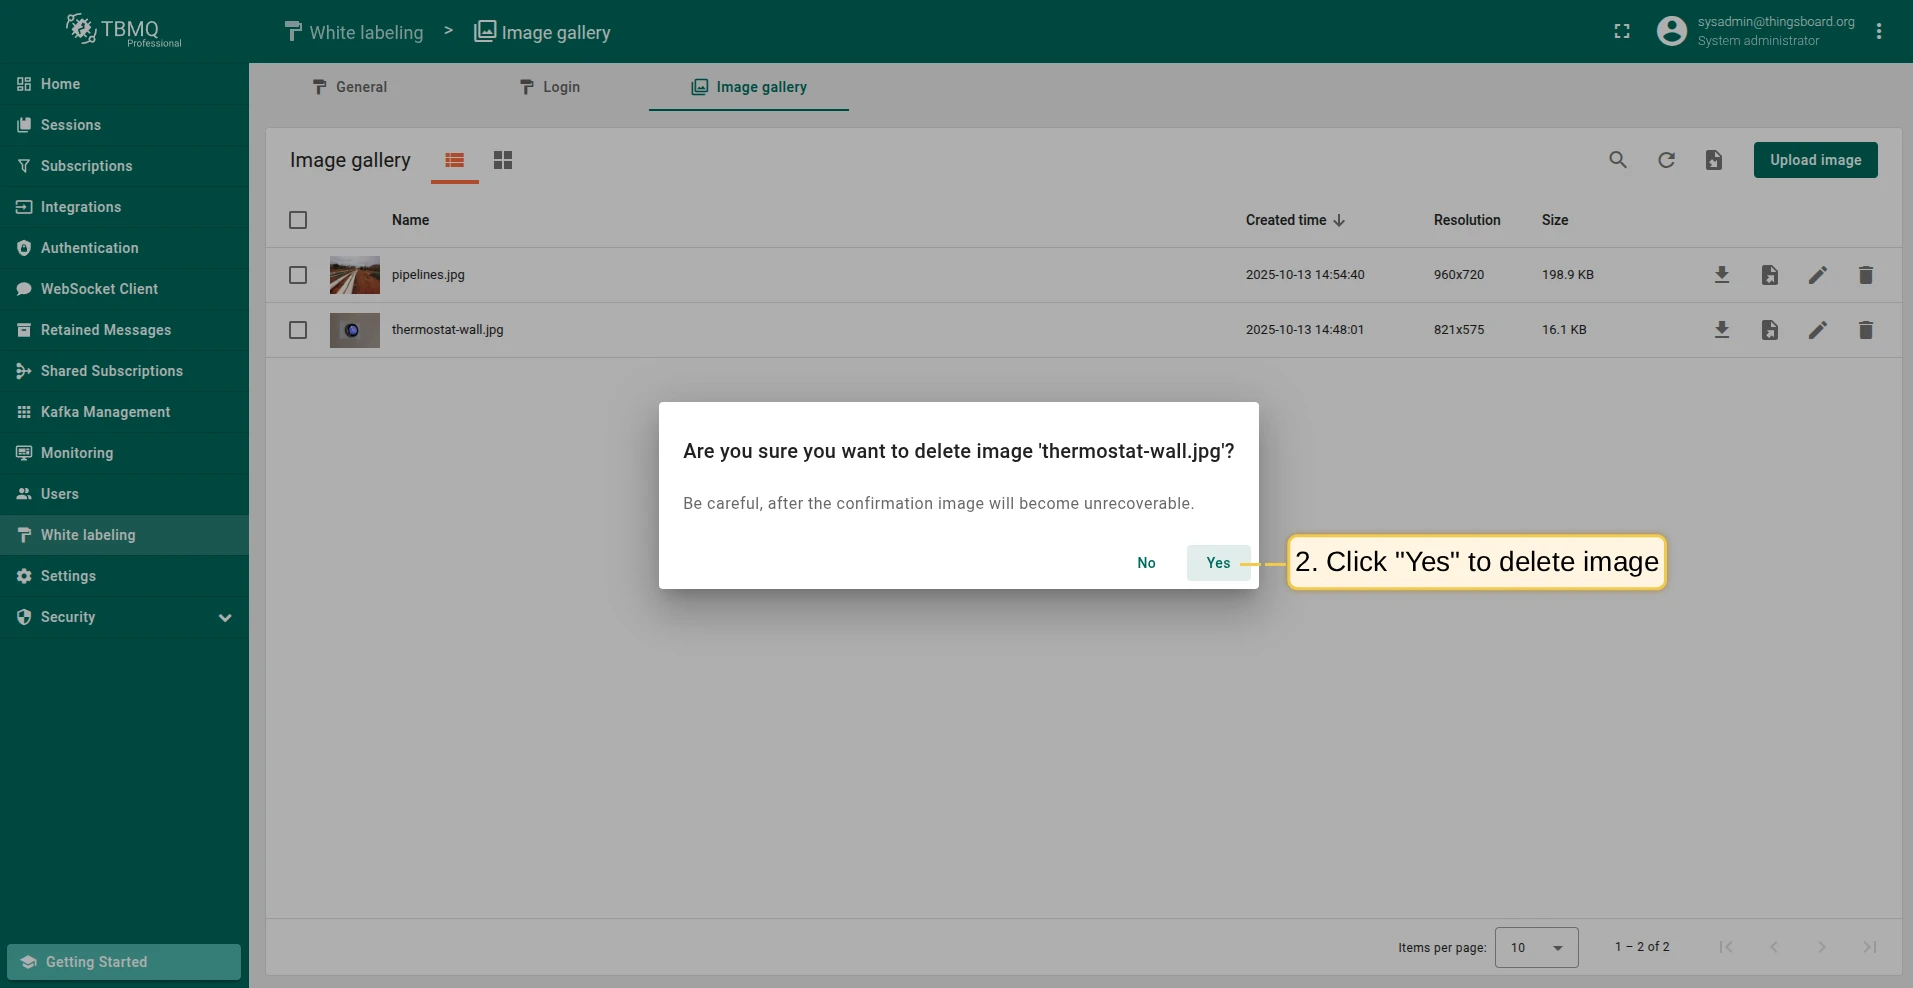
Section titled “Delete image”To delete an image from the list view:
-
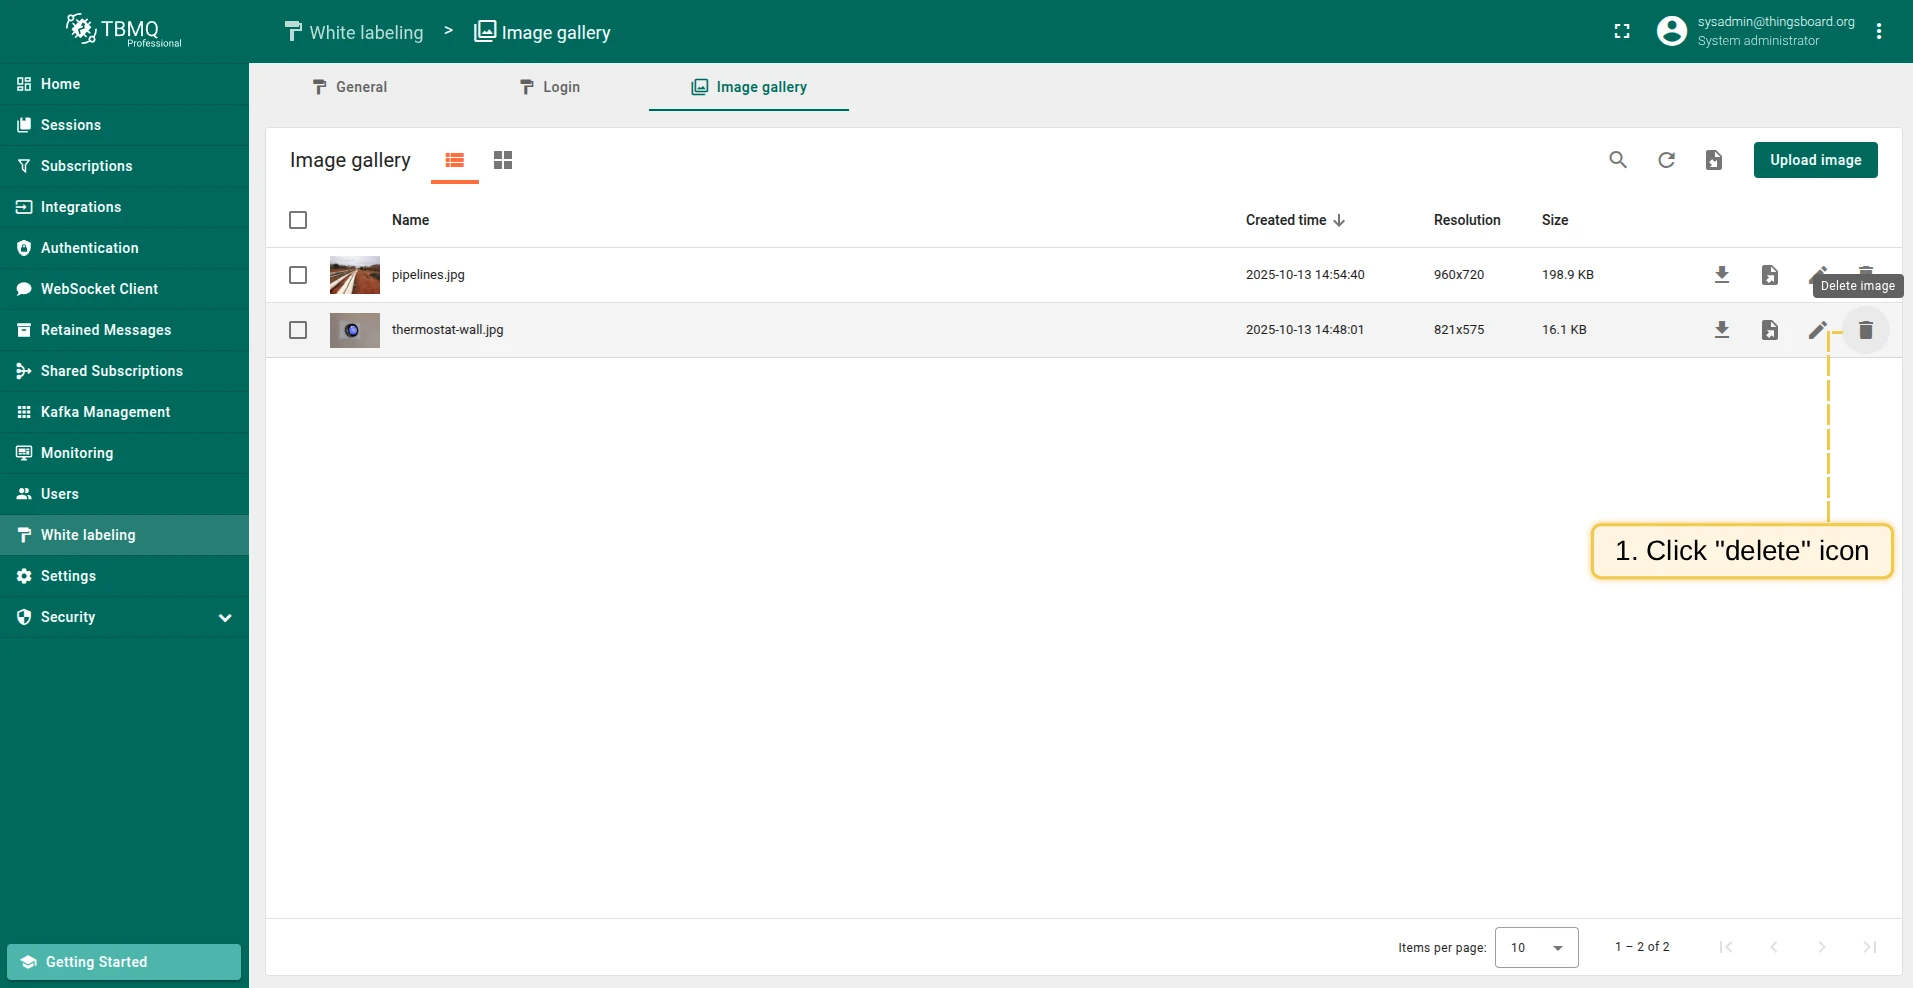
Click the Delete image icon next to the image name.
-
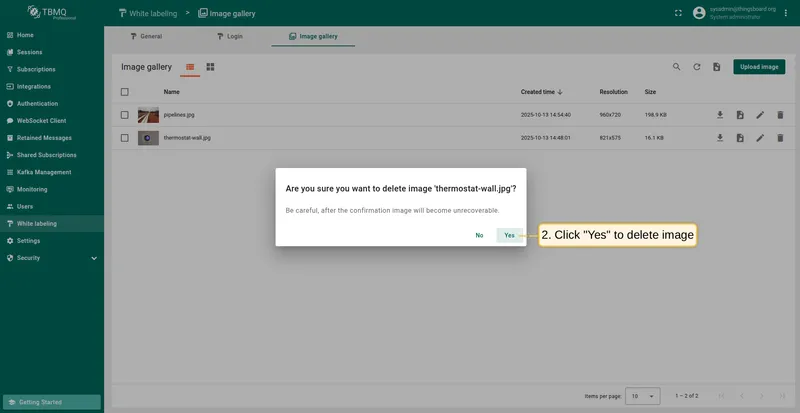
Confirm deletion in the dialog.
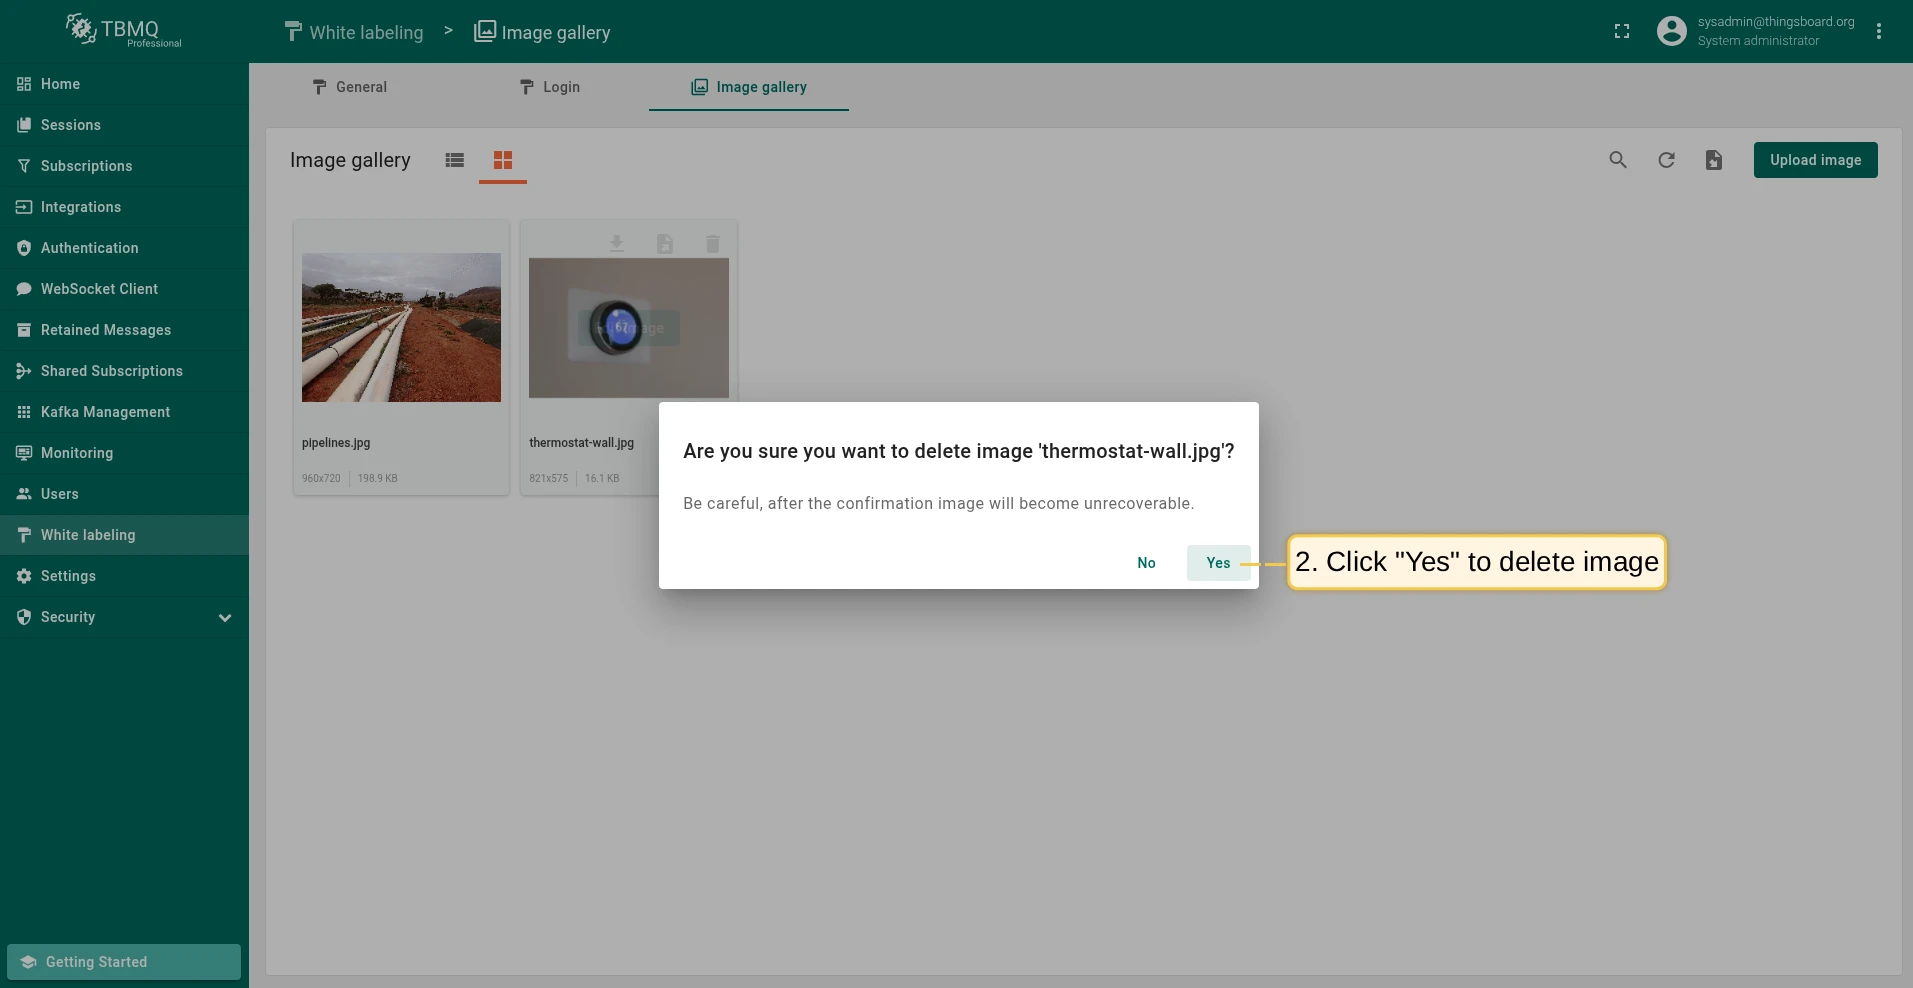
To delete an image from the grid view:
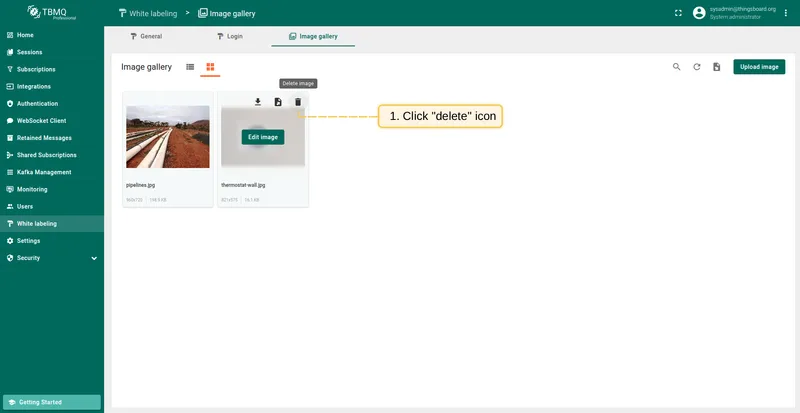
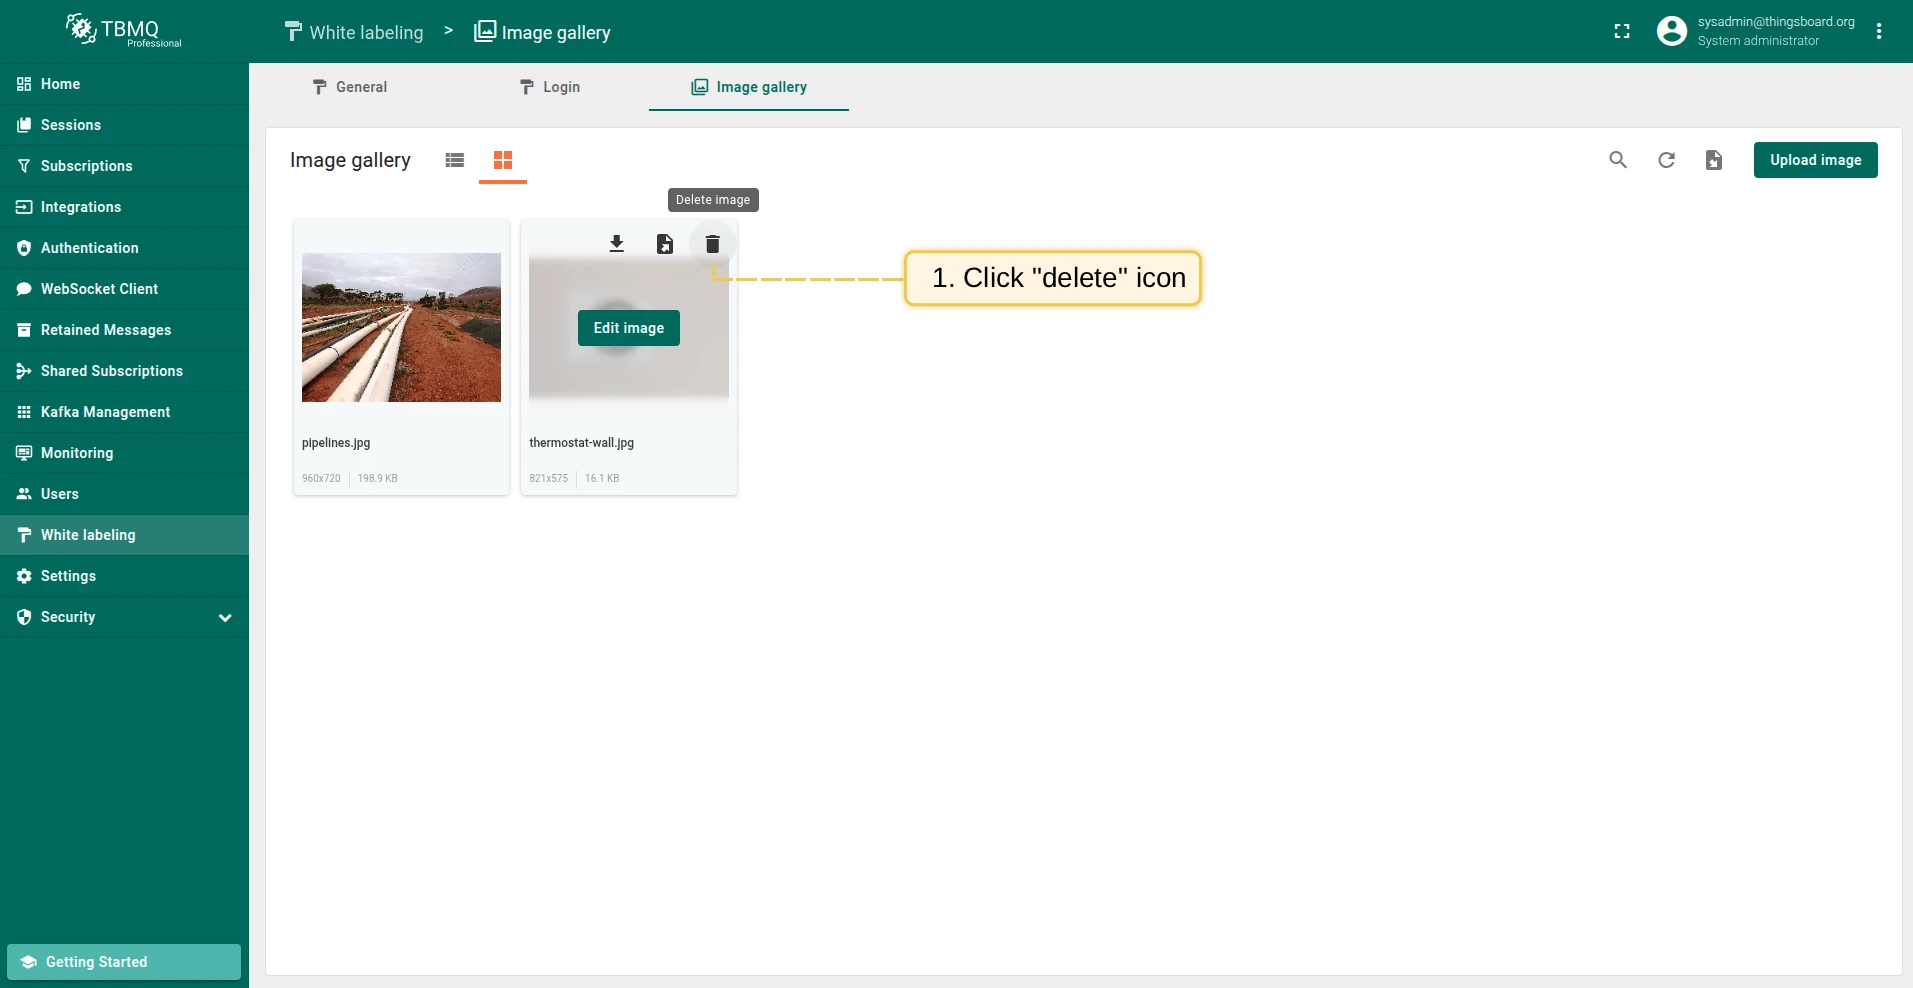
-
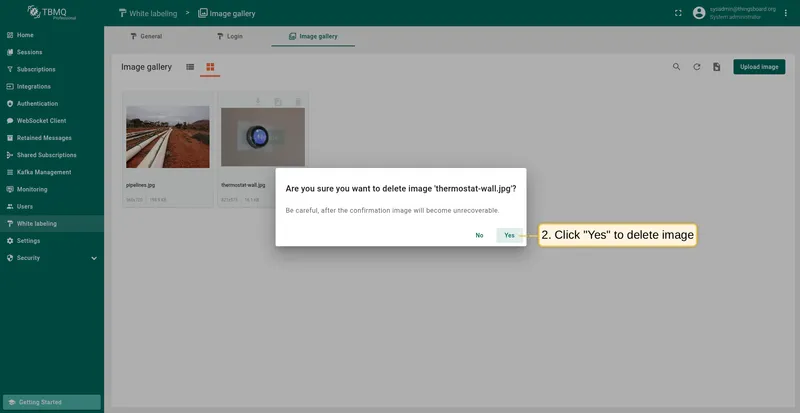
Hover over the image and click the Delete image icon.
-
Confirm deletion in the dialog.
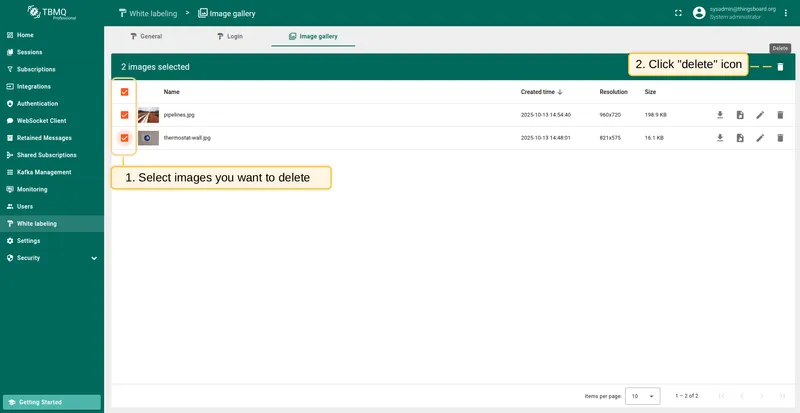
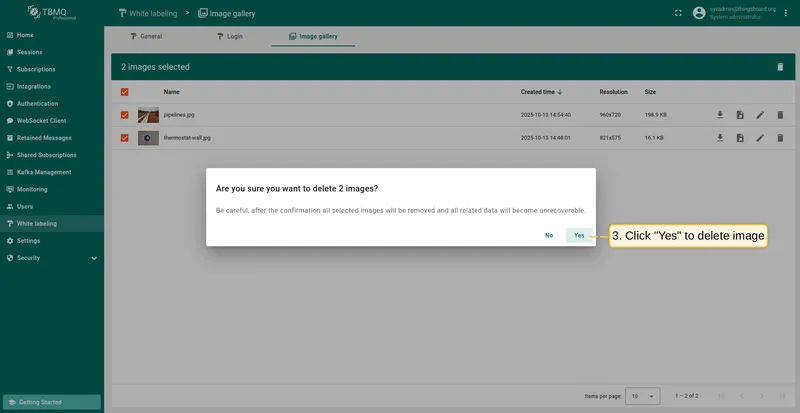
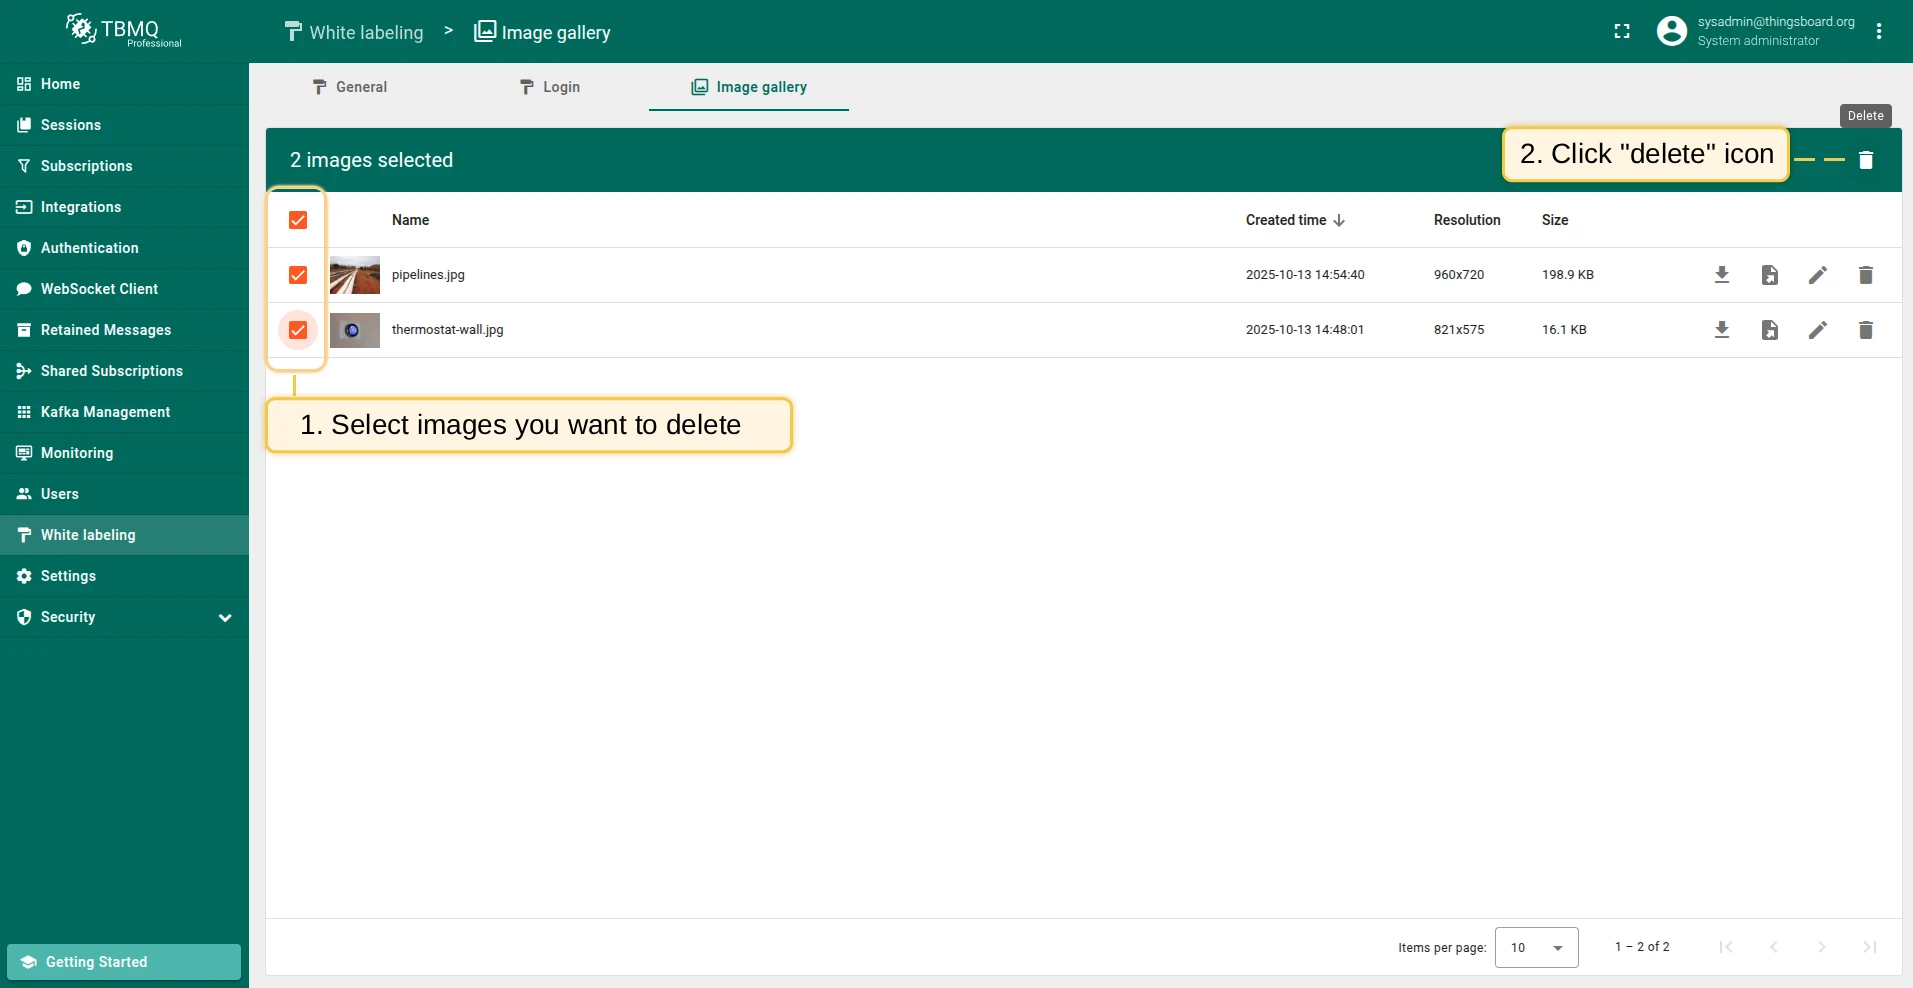
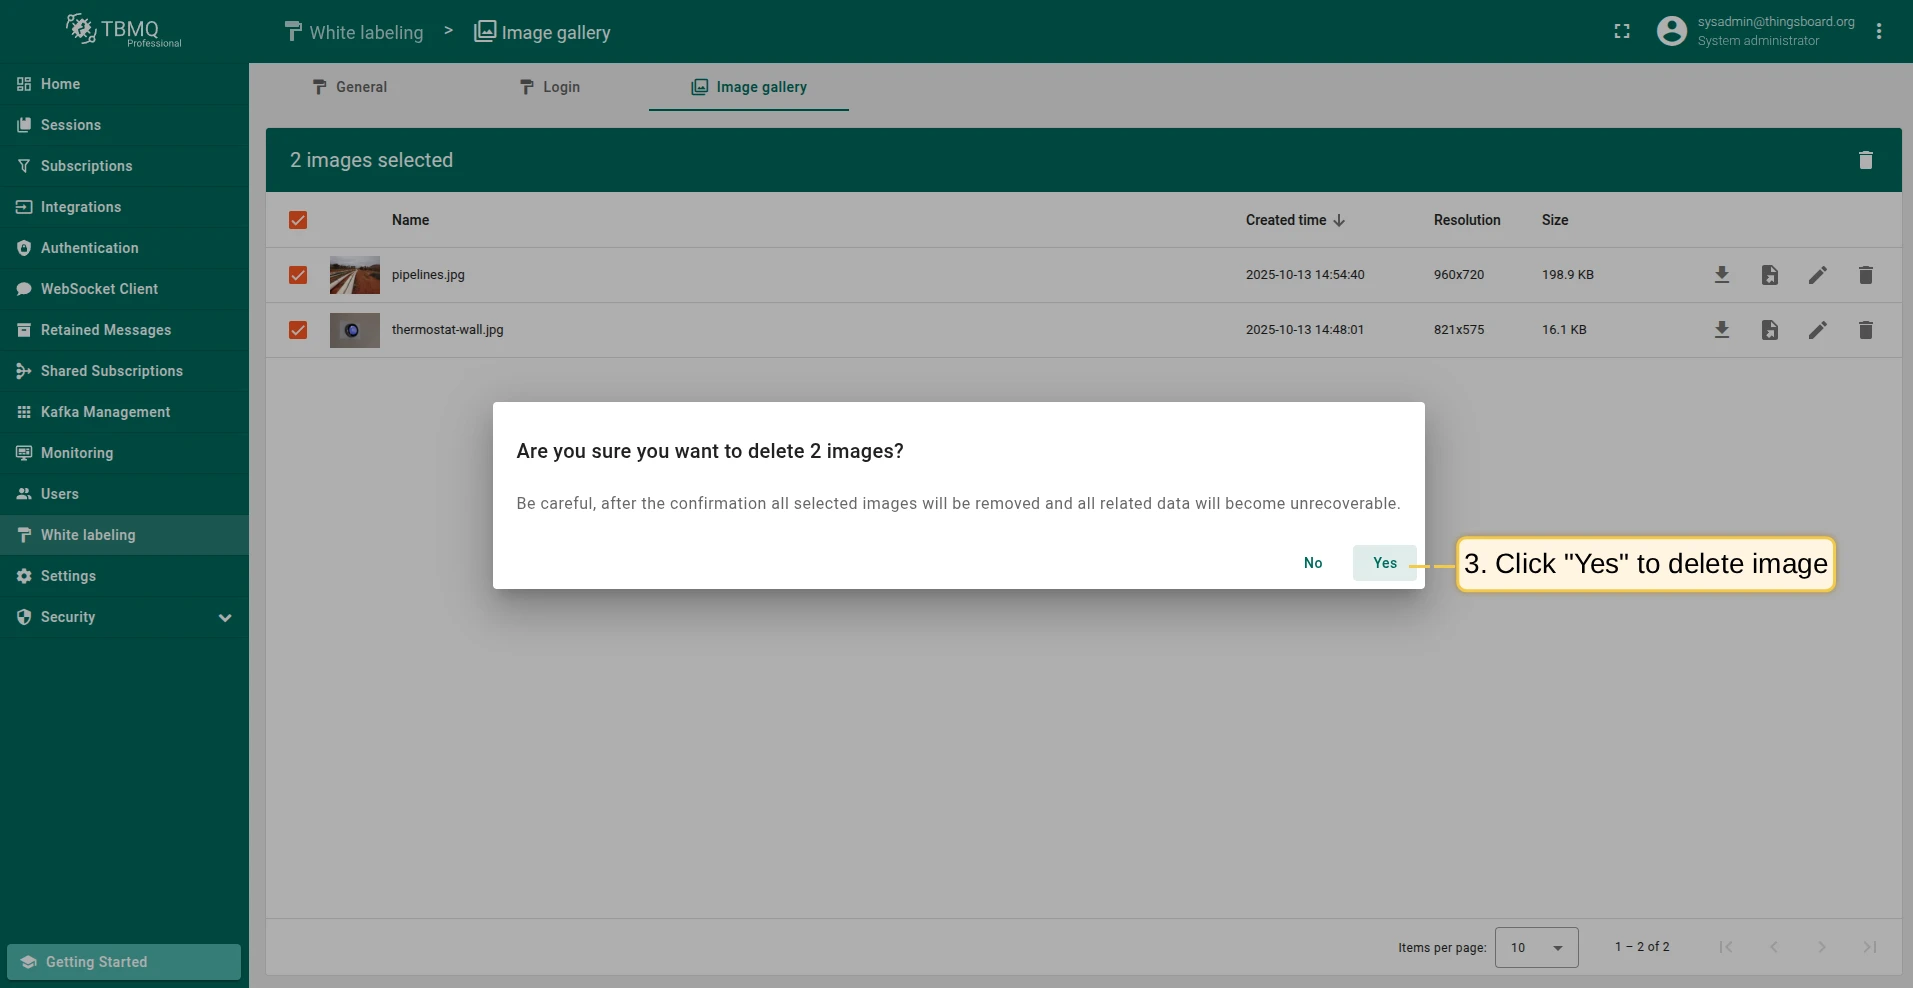
To delete multiple images at once (list view only):
-
Select one or more images using the checkboxes, then click the Delete icon in the top right corner.
-
Confirm deletion in the dialog.
An image that is still referenced by another entity — for example a logo assigned in white labeling — is not removed. Instead, TBMQ opens a dialog listing the images that were kept; review what uses them with the References button, then click Delete anyway (or select them and click Delete selected) to delete them regardless.
Was this helpful?